Showing posts with label bugs. Show all posts

Tuesday, March 1, 2011

Spring is coming!!

I am so happy that it's March!
Ever since I moved into our new house in September, I've been dying to do some landscaping and planting and gardening.
I planted just a couple of things last fall, and some bulbs.. which are slowly but surely starting to poke up from out of the cold ground!

One part of spring and summer that I enjoy the most is eating meals outdoors. I can't explain it... but there's just something about it that makes the whole experience more enjoyable to me. With that in mind and in anticipation of warm weather, I painted this little wooden utensil holder- perfect for a picnic, or any meal outdoors!

It has 3 compartments up front for silverware and one long compartment in the back for napkins.

I also realized that if you wanted to use it year-round, it would make a great desk organizer! :)

I found the original item at a thrift store. It was in okay condition, which means luckily it didn't need much work..... but just seemed like it needed a little cheerful pick-me-up. I painted the design in acrylic paints and spray-poly'd a couple light coats over the paint for durability.

If you're interested in a ladybug picnic all your own, the item is in my Etsy shop here:
http://www.etsy.com/listing/67921854/lady-bug-picnic-silverware-and-napkin

Or if you're in the market for any other custom-painted box or item similar to this, please contact me and tell me what you'd like! I love doing commission work :)

Happy March, everyone!


Friday, February 11, 2011

"In The Waiting Line" Operation Fill-A-Frame #6

http://www.etsy.com/listing/67892531/in-the-waiting-line-2-swallowtail-study
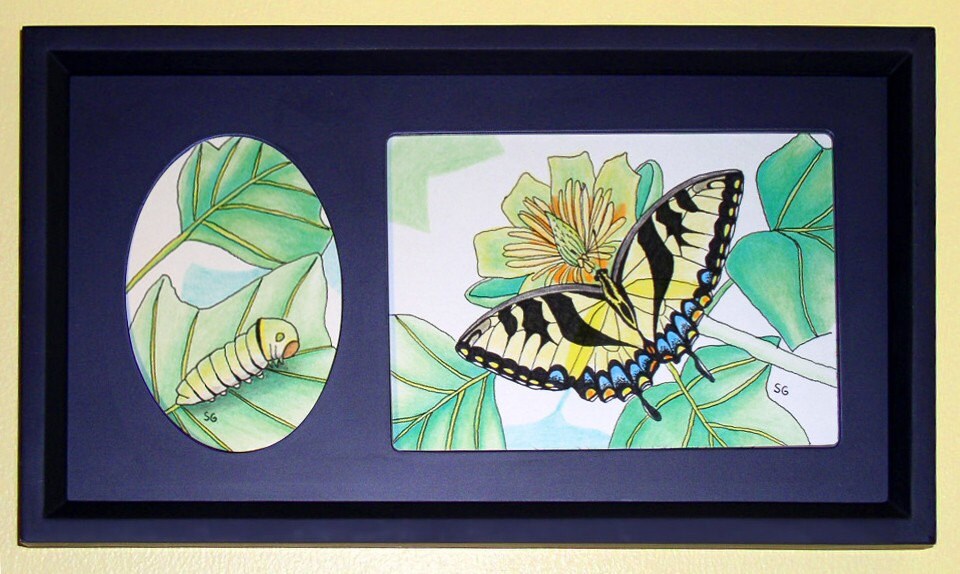
Operation Fill-A-Frame #6 is complete! This one is very similar to #5 and thus has the same title (with a 2 at the end). "In The Waiting Line 2" is another butterfly and caterpillar study, this time featuring the Tiger Swallowtail, also known as the Eastern Tiger Swallowtail.

Just like the Monarch "In The Waiting Line 1", the mat of this picture is outside of the glass, not under it. (It feels like a hard wood or plastic and is painted.) The two drawings are on a single sheet of Canson Recycled Bristol art paper, and the drawing was created with ink and my Forest Choice colored pencils.

This was another quick one, and thus, is a cheap one! $25 for this framed original drawing in my Etsy shop- you can see the listing here :)
http://www.etsy.com/listing/67892531/in-the-waiting-line-2-swallowtail-study

Man, oh man, did I learn a LOT while researching this piece.

First of all, let's talk about this caterpillar.
Years and years ago I painted a swallowtail caterpillar- does this guy look familiar?


He is, indeed, a swallowtail caterpillar. When I took the original photo of him and looked him up, that's what I learned. It made sense because the year I found him, our yard was covered in yellow tiger swallowtail butterflies.
BUT
It turns out, he's NOT the caterpillar of the tiger swallowtail. Nope. (It's very easy to get confused because if you do a Google image search for Tiger Swallowtail Caterpillar, just "swallowtail caterpillar" is included in the search and pictures of those guys come up!)

He is the caterpillar of the Black Swallowtail butterfly, seen here:

Photo by Derek Ramsey (Ram-Man)
So if those caterpillars weren't from the tiger swallowtail, then where did all those butterflies come from? And why were they staying??

Answer- because their host plant is (....drumroll....) the Tulip Tree! Well, that is one of their host plants (this should look familiar, too!) Our house was surrounded on all sides by Liriodendrons (I also learned the Tulip Tree has a bunch of different names!)  :)
http://www.samanthasartstudio.com/tuliptree2.html
And their caterpillars look way, way, way different than the guy above that I painted! What's very interesting is the variation in the caterpillars themselves. I was looking all over the web for clarification of the different caterpillars and didn't understand why so many different looking ones were all tagged as the tiger swallowtail.

Some are bright neon green. Some are brown. Some are multicolored. This is due to the different instars of the caterpillar. Each time the caterpillar sheds its skin, it looks slightly different. This happens to a lot of caterpillars, but this one seems quite dramatic to me.

Imagine my world being turned upside down upon finding out this whole time I've been telling people this caterpillar grows into the wrong butterfly!  (Sorry!)

AND
Imagine my confusion when I found out that all male tiger swallowtail butterflies are yellow and black, but only some of the females are yellow and black. The rest are just plain black! (There is also a rare morph of the two.)
See great pictures and the explanation here:
http://www.rlephoto.com/swallowtails/swallowtail_ET01.html
Eventually I'll learn the differences.... but in my confusion and endless searching for which butterfly was which, I found out there are Black Swallowtails, Black Tiger Swallowtails, Spicebush Swallowtails, and Pipevine Swallowtails
and
they
ALL
look
almost
exactly
THE SAME!

...Eeep!


Monday, February 7, 2011

"In The Waiting Line" Operation Fill-A-Frame #5

http://www.etsy.com/listing/67648352/in-the-waiting-line-monarch-study

Operation Fill-A-Frame #5 is complete! This was one of the frames I was looking forward to filling the most. "In The Waiting Line" features a big (4th instar) Monarch Caterpillar, crawling and munching his way among the Milkweeds, awaiting the time to turn into a chrysalis and become a beautiful Monarch butterfly!

The title seemed appropriate for a caterpillar and was also the name of a song I listened to while creating the art- listen here:


The mat of this picture is outside of the glass, not under it. (It feels like a hard wood or plastic and is painted.) The two drawings are on a single sheet of Canson Recycled Bristol art paper, and the drawing was created with ink and my Forest Choice colored pencils. I hadn't done a colored pencil drawing with ink in a long time- maybe not since my 30 bugs in 30 days project! I yearned to do something a little realistic, a little cartoony, and so this was created.

This was a quick one, and thus, is a cheap one! $25 for this framed original drawing in my Etsy shop- you can see the listing here :)
http://www.etsy.com/listing/67648352/in-the-waiting-line-monarch-study

I have another frame identical to this one and will probably do another caterpillar/butterfly combo drawing. I'm thinking an eastern Yellow Tiger Swallowtail butterflies for the next one!


Monday, January 24, 2011

Operation: Fill-A-Frame #4

"Love You To Death"
Oh man... what to say about this piece, where do I start?

Chronologically sounds good...
I started with the frame. I bought it at least 2 years ago. I thought the coppery-metallic-orange would look great filled with some orange tropical flower. But after getting the frame home I found myself less than enthusiastic about filling it. A tropical flower didn't seem right for it... but I had no idea what did seem right. So there it sat. I felt a twinge of guilt every time I saw it, thinking I had wasted money on yet another frame I was never going to fill, another project I was never going to complete.

In 2009 my awesome husband took me to Reptiland in Pennsylvania for my birthday. The place was amazing! (I loved it so much we returned in 2010.) There were frogs, snakes, turtles, and a butterfly house! Since it was late in the year when we went, most of the foliage and flowers were gone and only a few lonely surviving butterflies remained. I took tons of pictures of them. It was cold; they weren't moving much; you could get so close to them.

Here are two of the pictures that I took and the two that inspired the piece of art:


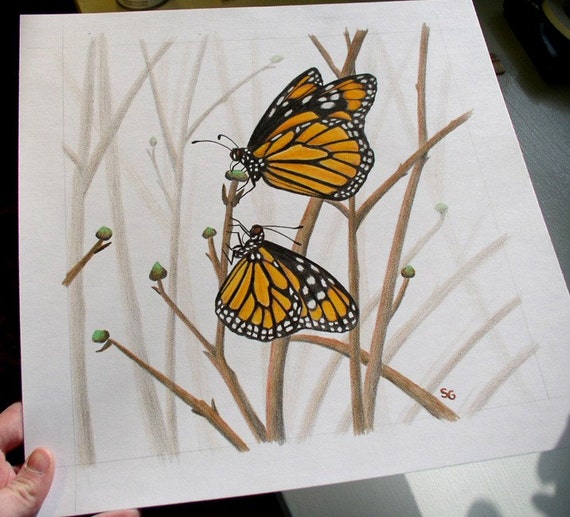
Fast forward to now and it's January and I'm working on this Fill-A-Frame project. I decided to take a break from the 8x10's and standard sizes I had around and get this square copper frame back out. I decided instead of a tropical flower, a monarch butterfly would look much better with the orange tones. I went through my Reptiland pictures again and loved the composition with the two butterflies (above) so much that I did a nasty (meaning, executed poorly but good and accurate enough for me to work from) rendition via Photoshop of what two monarchs would look like in the same position and began to work on the drawing.

Nasty Photoshop reference rough-draft
(I originally planned to extend the drawing onto the mat again, but I didn't have any white or light colored matboard around and eventually decided that I wanted only a small mat on this art, so unless I messed up the mat and HAD to color over it, I'd rather just have a plain mat.)

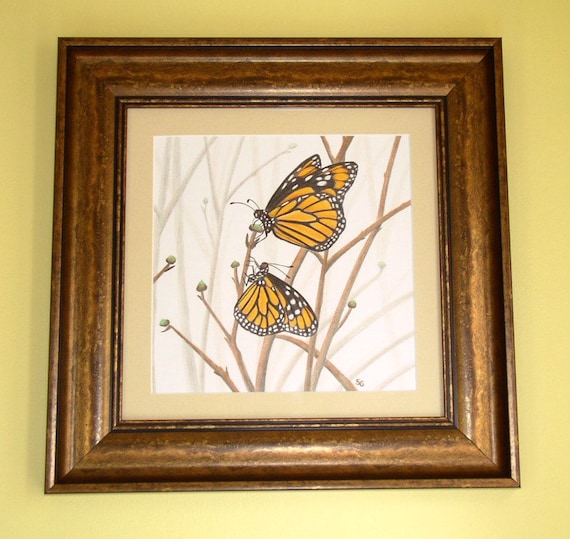
Here's the finished drawing:

I usually have trouble naming a drawing or painting, but most of the Fill-A-Frame project names are coming from songs or albums I'm listening to at the time that I create the art. It seemed quite fitting for this piece that the song I currently can't stop listening to is called "Love You To Death."


Why fitting?
I know, usually my art is super cheerful and happy, right? I definitely stepped out of my comfort zone a little for this one.

Here's why. The pictures that inspired the art were taken in a butterfly house... right before winter. Normally Monarch butterflies would migrate, but when importing live butterflies (chrysalis) from other states into a butterfly house, it's actually illegal to release those butterflies into the wild. When you visit a butterfly house, do you ever notice all of the signs asking you to check for "hitchhikers" before you leave? It's not just because they don't want to lose their butterflies... they don't want to break the law! When non-native species are released into a new environment, they can breed like crazy and mess up entire eco-systems... so there are strict laws against releasing those imported butterflies.

So even though the Monarch species was native to the area of the butterfly house, they still weren't allowed to be released into the wild. They, and the other remaining butterflies, had to just sit in the butterfly house and wait to die in the cold. I found it particularly sad with the Monarchs since they would've normally migrated south. They were imprisoned and just waiting for death.

Since there were a pair of them in this picture (well, in my made-up picture), it seemed at least a little more comforting that the two butterflies had each other and could wait for death together. Hence the "Love You To Death" title. (I know that's not what the actual song is about, but the title fit well.)

Next it was time to mat the drawing. Since I didn't need a huge mat, I went to a local art gallery to see if they had any matboard scraps around that they might otherwise be throwing away. Sometimes galleries will sell them to you cheap or in rare and especially nice cases just give them away! :) I got EXTREMELY lucky because not only did I find one of those NICE galleries, the lady working in the matting section even cut it to size (I did the inside cut) and the mat was this really cool tan color with some grayish-fibery-pieces in it. It was perfect; no way was I going to draw on it.

I put it all together, and there you have it. My first piece of sad artwork.


Sunday, January 23, 2011

Operation Fill-A-Frame #2 & #3

I filled up a couple more frames a while back and completely forgot to post about it!

Valentine's Bugs!
This artwork wasn't created specifically for Operation: Fill-A-Frame, it was actually created last year for an Etsy Team Challenge. However, like the frames, it was something I had laying around that I wanted to finish (i.e. frame it) eventually. So the two projects came together perfectly! I had the art... I had the frames... They just needed mats.


I was really torn between matting it in green or red. The dark green went well with both pieces and seemed practical because dark green is easy color to match to almost any decor in any home. But since the art was created for Valentine's day, it made sense to frame it in the obligatory red. People love buying things in red for Valentine's day... for what other reason does every store currently look like red, pink, and magenta came in and threw up all over their entryway!?

I decided to offer the option of either color mat.

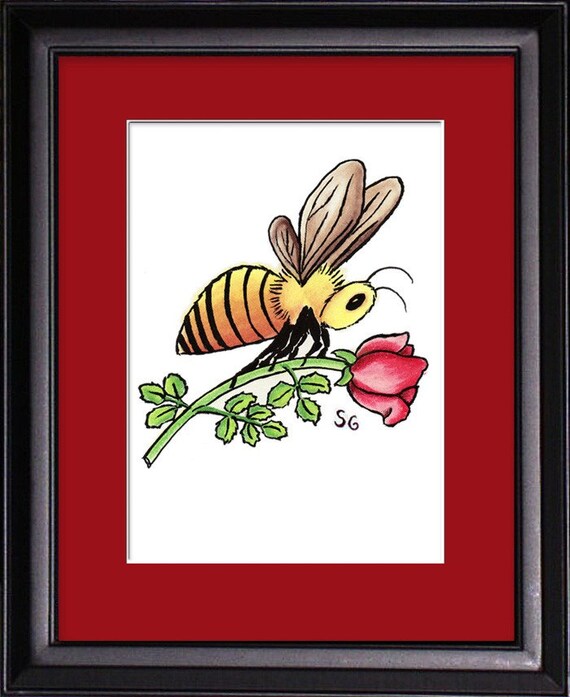
They are both pastels with ink. Both pieces are currently $35 each, but check the listings as they may go on sale. I may offer a bundle discount if someone's interested in buying both!

Original "Bee Mine" framed artwork
If you're interested in buying this piece or seeing more photos, it's here in my Etsy gift shop:


Original "Love Bug" framed artwork
If you'd like to buy this piece or see more detailed photos, it's here in my Etsy gift shop:

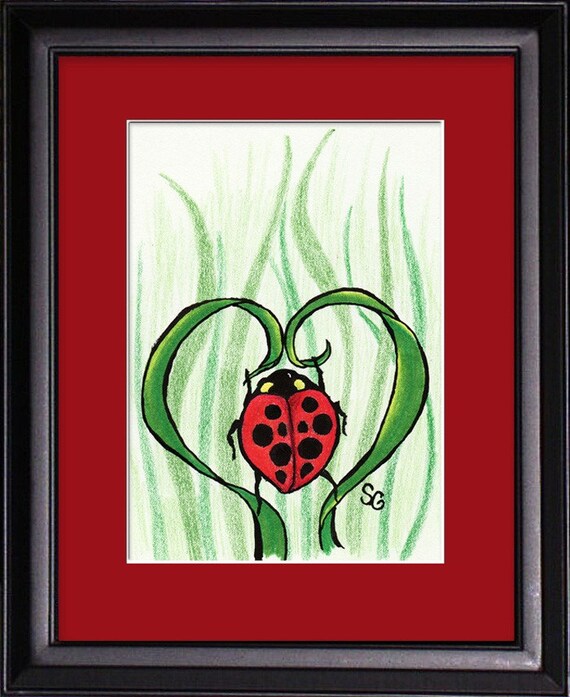
This ladybird beetle one was a tough one- I had an idea for the composition but it took a lot of sketches to get it just right. Ladybugs love climbing around on the grass and the red and green colors look so nice together. The little beetle is pulling down blades of grass into the shape of a heart, and I made his little body slightly heart-shaped too :)


Sunday, July 25, 2010

Here Today, Gone.... Later Today

A day or two ago I listed this Bees & Cherries (decoupaged with a print of my "Busy, Busy Bees" painting) in my Etsy shop.


I found out this morning that it was featured in this adorable Treasury:
http://www.etsy.com/treasury/4c4ac8dc4a9f8eefe0bf1f0f/cherries-jubilee

And then found out later today I sold it! :)

My Etsy shop is currently still very empty as the things with which I'm filling it take a loooong time to make. Part of that is simply due to drying times combined with my own multi-tasking; Part of that is due to my own inexperience with this type of thing and still learning, and of course only listing an item in my shop when it is absolutely 100% perfect... or as perfect as I'm capable of making an upcycled item. I hope as I learn more and more about working with certain materials, I can get items listed a little faster and complete more of them, because creating these little gifts is a blast!

It's super fun to take trips to thrift shops and find just the right little items that are well crafted, but just need a little makeover. You never find the exact same item twice, so no two will ever be alike. Maybe a defect on the wood somewhere becomes something you have to paint over, which is a new and unique challenge. I could easily go to a craft shop and buy boatloads of wooden or even paper boxes to paint and decoupage, but where's the fun in that? Plus the whole point of finding a used item is not consuming new resources... which adds in another element of challenge and craftiness and uniqueness!  :)
*
*


Friday, July 16, 2010

Soon, little bees.

Soon I will be back to gardening and planting for you.

For now I will reminisce with old photos.
          Come with me and let's enjoy these bees from 2008  :)


"We're in your flowers... Pollinaaaytin' your world!!"


P
P


Sunday, July 4, 2010

Caterpillars Finally Finished!

Yay! My little Monarch Caterpillar Triptych is finally finished!! I just have to spray them with sealer, but right now my porch is too sunny to do so.
I must wait. 

What's fun about these little guys is that there are a variety of ways to hang them... I originally designed them to be in a vertical configuration, but my husband suggested trying them horizontally and I found they worked that way too.

Or they could be hung separately- the two smaller ones on one wall, the long one on another wall.... however you like!

Horizontal with edges lined up...

 Horizontal & centered...


Vertical.

I kept these guys way, way, WAAYY less detailed than my usual work. I was going for something fun and illustrative rather than realistic. I did try to keep the caterpillars themselves pretty realistic looking though, and because of that I didn't want the plant life around them to distract from them. I also found Milkweed is a pretty challenging flower to paint- there are just so many tiny flowers all clustered together. But after I had two layers of paint on these flowers, I decided I was satisfied with them. If I had put too much detail into them, I think the leaves and stems would have looked unfinished.

I'll be bringing them to the Ned Smith Nature & Arts Festival in a couple weeks. Come check em out in person! :)


Sunday, June 13, 2010

Ned Smith Center Nature and Arts Festival!

I am very excited that I've been invited to exhibit (and sell, of course, hehe) my art at the Ned Smith Center for Nature and Art 17th Annual Nature and Arts Festival in Millersburg, PA! (Only about 40 minutes from Harrisburg!)

None other than the Mothman himself wandered into my booth at the Patriot News Artsfest a couple of weekends ago and overheard me talking to a friend about the caterpillar painting I'm currently working on. Naturally hearing "caterpillars" his ears perked up, and when he introduced himself as someone whose life has been amongst moths MY ears perked up.

I was so excited to ask him all about moths, and he was so excited to tell me all about the Nature and Arts festival. It's just a one day show on July 31st, but it sounded like a lot of fun and is very close to where I live.

Since we've started the house-hunting process, there is a chance that that weekend could be pretty busy or hectic, depending on when we find a house and when our move will take place. Since it's just one day, and hopefully my husband and I do a better job than last time of getting all our sh#t packed up on time, I could probably free myself up that day regardless.

I'm pretty excited about the show and have a swarm of ideas buzzing around in my head of some drawings (and paintings) I might like to try and get done in time for this show specifically... we'll see. I've spent a couple hours today on the caterpillar paintings and hope I'll be able to get the leaves all finished, and then I can start the milkweed flowers and finally finish up with the stars of the painting.... the caterpillars themselves!!


Friday, May 14, 2010

Bug-ket List

A lot of people have a 'Bucket List." A list of things they want to do before they kick the bucket!!
What's on yours?

I just got done reading this post on my good friend's blog: http://crochetingingeorgia.blogspot.com/2010/05/moth-identification.html

And realized I have a Bugket list. A list of bugs I want to see before I die. Even if not in their natural habitats, to see them up close would be amazing. Because I know quite well from experience that most often, photos of bugs just don't do them justice!!

First on my list is the Oleander Sphinx Hawk Moth. I drew one of them in my "30 Bugs in 30 Days" series (hard to believe this time last year I was starting that series!). It lives in parts of Asia and Africa and migrates over to Europe for the summer. Looks like I have some traveling to do!!

A little closer to home (but not for long since I'm moving some time this summer) is the Pink Katydid! I can't even remember how I found out about this thing. I believe I just Google-image-searched for pink bugs and lo and behold, apparently right here in the Pennsylvania mountains, you can find them! They are very rare (you would be, too, if you were fluorescent pink hanging out on a bunch of green plants with hungry birdies flying all around), but it sure would be neat to be able to find one. Since I'm moving to DC, PA won't be too far away and maybe I'd be able to plan a weekend of hiking next year if I don't get to find one this year.

Or, perhaps, I could plan a trip with a little more purpose...

According to this blog, next time I'm visiting my in-laws, I should go have a look at this nature preserve near Chicago. Apparently they had some there!
http://featuresblogs.chicagotribune.com/chicago_gardener/2007/07/katy-you-didnt-.html

Here is another great blog from a guy who seems to like bugs just as much as me, all about his encounters with pink katydids! Awesome!
http://jimmccormac.blogspot.com/search/label/pink%20katydid


Wednesday, April 28, 2010

Adaptive Caterpillar-tych

Jessi's 'Pillar Pic... "Peekaboo!"

My best friend since elementary school recently posted a couple of pics on Facebook of some monarch caterpillars. As you may have guessed.... I kind of have a thing for caterpillars- especially after spending so much time with them last summer at the Hershey Gardens butterfly house. Soooooo I've been wanting to paint some more 'pillars for a while now. After I saw this picture last week, I couldn't get it out of my head and the deal was sealed. It's been so long since I did anything art-y...

I HAD TO START SKETCHING.

After about 6 renditions, here's what I came up with:


I thought it would be best to keep the painting small as I don't have a TON of time to do anything too big and involved. PLUS I have a new technique that I want to try and really don't want to go experimenting with a big ol' expensive canvas!

I've had these two really nice 6"x8" canvases for a while that have just been sitting in a closet on a shelf where I see them ALL the time, but never had any ideas for them. They were given to me as gifts and 6"x8" isn't an "off the shelf" easy-to-find-frame-size, so I knew I'd have to paint something on them that wouldn't need a frame. Since I have two of them, I figured I would keep the two odd-sized canvases together and always assumed I'd use them for some kind of diptych. That seemed perfect for this project AND I love the idea of eventually doing a bunch of caterpillar paintings so why not do..... A CATERPILLAR DIPTYCH!

Cause we all know TWO are better than one! :)

I began working on ideas for the 2nd composition and made sure to arrange it so that the plants between on the two canvases didn't connect perfectly, but it would be enough to show they are meant to go together. Thus it can be hung vertically or side-by-side, and it won't matter which is on the right or left.


So... the new technique I mentioned.
Here you can see something I started last summer in my "30 Bugs in 30 Days" series, when I decided the background didn't have to be 100% photo-realistic ALL THE TIME, and for the first time I played around with bright colors and more imaginative effects.

There's a 2nd part of the new technique that I'm going to play around with on this one, too...


The leaves that are painted green here are probably pretty much done. Usually I'd blend them more into the background in a fuzzy way, the way a camera lens might if this was a photo. This time I'm going for something more illustrative- not necessarily catroony, but definitely not realistic either. I want to see what happens if I do some layers throughout the painting and these leaves are the furthest away, so they'll be close in color to the background and have no detail on them (but keep the sharp edges). I'll do some light coats of the background-yellow over them to blend them in a little more. As I work toward the foreground, I'll add more and more detail. I'm hoping to paint the caterpillar and leaves with as much detail as possible to really put the focus onto them. We'll see how it goes.

~ * ~ * ~

I've recently discovered that I'm not a hoarder after all. Like most artists, I have a decent stash of blank canvases put away just waiting for a creative moment. A lot were given to me as gifts; some I got when a local store went out of business and had canvases on sale, so I picked up unusual shapes that are harder to find at the big box art/craft stores.

When I pulled the little 6"x8" canvases down off the shelf, at first I thought I had 3 of them as there were 3 canvases all stashed together and from the side they were all the same size. I immediately considered doing a triptych, but found the 3rd canvas was actually 6"x12" (which is a pretty fun size to work with) so I put it away to save for another day.

I kept thinking about that canvas being 6" wide, the same as these, just sitting there up on that shelf. Today became "another day" when I decided it would make a perfect and really interesting long, skinny triptych with these caterpillars. When I showed my husband my idea, he arranged the canvases in yet ANOTHER cool and interesting way (cause he's an engineer and that's what they do) which made me even more excited about the project, since my slight hesitation was that if someone fell in love with all 3 canvases, would they be just happen to have the right long skinny wall to hang all 3 of them on???

Check it out:


I love this idea because I can paint them subtly enough to "go together," but no matter how they end up being hung they'll still have a nice flow between them. Of course, each of these can work as a stand-alone painting and I'll especially keep that in mind for the long one in the center. Then they can be placed in different spots throughout a room- or if all 3 don't end up being purchased together (sad!!), it won't look lonely :)


Tuesday, March 23, 2010

Addendum to LLS Fundraiser!

I'll be working until at least Mid-May to help raise funds for cancer research!

I'm now also offering *just prints* (no frame) for this fundraiser, too! You can get any of my "30 Bugs in 30 Days" series for a $5 donation per insect! :)
Pick out your bugs by clicking HERE!

The printed bug graphic will be standard ACEO size of 2.5" wide x 3.5" tall, with a printed colored border all the way around, as shown to the left.

To order a print (or 2 or 3...) you can comment on this post or send me an email to:
samanthasartstudio@verizon.net


Please let me know:
1. Which bug(s) do you want?
You can give me the number or the name of the bug- if I'm unclear I'll send an email back to confirm before I print!

2. What color border would you like?
There are a couple of ways you can tell me the color of your choice.
#1: You can specify a color in the image that you want the border to match (for example in the cicadas print above, you could specify the border to be the same green as the leaves.)
Or...
#2 See the color chart below and use the color code written in each block to specify a color. For example, if you want a light lime green border, you could tell me "99FF66". If the color chart is fuzzy, just click on it and you'll see it more clearly.

If you're ordering more than one print, let me know if you want a different color border on each print or I can make all of the borders the same color for a good sense of unity, if you're hanging the pictures all together!

3. What size would you like?
You can get either a 5"x7" or a 4"x6", both standard "off the shelf" frame sizes easily found at almost any store!

4. Go to my Team in Training/LLS fundraiser page and make your donation.
Using this page to make a donation ensures 100% of your contribution goes directly to The Leukemia & Lymphoma Society!
http://pages.teamintraining.org/cpa/nervetri10/sgallagm0a
Please be sure to include an email address where I can contact you when you make your donation :)
When I receive an email notification that the donation has been made, I'll send you an email to confirm the order, address, and anything else!


Friday, March 19, 2010

Art Fundraiser for Cancer Research...


Good morning to all, and a happy (almost) Spring Friday!
It definitely feels like Spring in the Northeast today!

As you may have noticed, I've been a bit scarce on ye olde bloge lately. No, I haven't been on Art Sabbatical in the beautiful Caribbean with no internets. But as you can see on the left side of my blog in the purple widget, I've been training!

In May I'm participating in a triathlon as part of The Leukemia & Lymphoma Society's (LLS) Team in Training! Team in Training (TNT) is LLS's largest fundraising program. Members train for months to participate in endurance events with the assistance of coaches and mentors who volunteer their time for this cause. During that time we also raise funds to help find a cure for blood cancers.

Research funds are crucial in finding a cure for this disease: For patients with Leukemia, the five-year relative survival rate has nearly quadrupled in the past 48 years! The other great thing about this news is that many of the same methods used to fight blood cancer can be used to treat other cancers (breast cancer, prostate cancer, etc.) too!! I know that by becoming a member of TNT and helping to raise money for LLS, I am making a difference.

As a way to raise funds for my mission (I'd like to raise at least $1500 but ultimately my goal is $2000 by mid-May!), I'm having an art fundraiser! So... Here's how you can get some art for a great price AND donate toward a great cause... (and it's tax-deductible! Woohoo!)

You may recognize these guys from my 30 bugs in 30 days series!


Beautiful 6-Spotted Tiger Beetle:
Bug #15 print with *printed* bright yellow-orange border in a cherry stained frame.

5"x7" (bug print in center is standard ACEO size of 2.5" x 3.5")

$10


Sweet Snail:
Bug #17 print with *printed* bright salmon colored border in a black frame.

5"x7" (bug print in center is standard
ACEO size of 2.5" x 3.5")
$10


Ladybugs:
Bug #29 print with *printed* bright green border and a black mat in a black frame.

5"x7" (bug print in center is
standard ACEO size of 2.5" x 3.5")
$10


Honey Bees:
Bug #6 print with bright yellow mat in a black frame.

4"x6" (bug print in center is standard ACEO size of 2.5" x 3.5")

$10


Stink Bug:
Bug #28 print w
ith *printed* bright green blue border in a black frame.
5"x7" (bug print in center is standard ACEO size of 2.5" x 3.5")
$10


Praying Mantis:
Bug #8 print with *printed* periwinkle blue border and a white mat in a periwinkle frame.

5"x7" (bug print in center is standard ACEO size of 2.5" x 3.5")

$10


100% of the proceeds from this fundraiser are going to The Leukemia & Lymphoma Society. The prints have been donated by me, the frames donated by my family.

If you see one that you love and would like to buy it and make a donation to LLS, please:

1. Leave a comment on this blog post saying which one you want & your name (first name, last initial is fine). These are going on a first-come-first-served system *but* if the one you want has been spoken for, I can probably make you something almost identical- just ask! Send me an email: SamanthasArtStudio@verizon.net

2. Then go to my TNT fundraiser page here:

http://pages.teamintraining.org/cpa/nervetri10/sgallagm0a

and in the "Make a Donation" section, fill out the cost of the item you wish to buy & complete the rest of the info to make your donation.

3. When you make your donation, please be sure to fill in your email address so you can get a receipt if you'd like to write off your donation & so I can contact you and confirm the address where you'd like the art to be shipped (or if it's a gift, you can let me know, etc.).

4. When I see that your donation has been made & confirm the necessary details via email, I'll package up your art and send it out! (If you'd like to help with shipping charges let me know- otherwise shipping costs are on me as a Thank You for donating!) Or if you're local, I can hand deliver :)

I apologize that it's not as simple as shopping in my online gallery. To maximize the funds donated to LLS, it's important to donate through my training page rather than PayPal. It eliminates all the middle-men and any extra fees that would be taken from your donation.

If you're a Facebook fan, you can also view my fundraising album on my Art Page and leave a comment on the item you'd like.
Samantha Gallagher's LLS Art Fundraiser on Facebook


Don't see anything here that you love?
Be sure to check out my entire "30 Bugs in 30 Days series."

I can print any of the bugs to a 4"x6" or 5"x7" size with the colored border of your choice and frame it up for you!

I can also paint the frame a color of your choice, but please note that this could add a couple of extra days onto production- depending on if I already have the color paint that you'd like and the weather could impact painting/drying time.

Thanks everyone! Stay tuned as I will be adding more to this fundraiser soon.


Thursday, March 18, 2010

My Favorite Commercial....

Spring is almost here! I just love everything about this commercial... well, except for the fact that I think soda is gross. But I love the happy music, the animation, the cute bugs...


Yay to Coca-Cola for celebrating bugs! :)


Monday, November 30, 2009

Cyber Monday Promotion!! Free ACEO bug print...

It took mere nanoseconds of being online this morning to realize that today, everyone with an online shop is having special promotions! It IS "Cyber-Monday" after all- apparently the biggest online shopping day of the year!
In honor of Cyber Monday, I decided I'd start my December promotion today. A little early. Cause that's the way, uh huh, uh huh, I like it.

Starting today, and for the month of December, you will receive a FREE print (of your choice) of one of my "30 Bugs in 30 Days" ACEOs with ANY order from my online gallery shop!! :)

Here's how to get your free insect ACEO print:
  1. Go to my online gallery shop and place some goodies into your cart...
  2. In a new tab or window in your browser, go to my flickr "30 Bugs in 30 Days" set of pictures (links are also available in my shop) and decide which of the 30 bugs is your favorite!
    http://www.flickr.com/photos/samanthasartstudio/sets/72157618274937415/
  3. When you go to PayPal to check out, write the name and/or number of your favorite ACEO bug choice in the "Notes to Merchant" section. (If you can't find the "Notes to Merchant" link, you can also email me the details of the bug you'd like to add to your order.) If you'd like a specific color for the border of your image, please specify this as well!
The size of the print you will receive is 5" x 7", an easy-to-find standard frame size. The insect ACEO printed graphic will be the standard ACEO size of 2.5" x 3.5". It will have a colored border around it (color will be chosen from something in the image, unless you specify a color you'd prefer), which will make for easy framing and you won't need a mat! You can also cut down the image to 4"x6" or smaller if you like.

Here is an example:


Happy Shopping!**

(** note: I do realize that I'm making a promotion post immediately following a post about shopping/too much stuff/consumerism etc. However, I happily and enthusiastically promote shopping handmade and/or eco-friendly.) :)


Friday, November 20, 2009

Last Featured Bug Shop: Honeybee Crochet!

Last (but NOT least!) in my list of featured Etsy Buggy shops this week is:

HoneyBee Crochet,
AKA SturmDM on Etsy!


Honeybee Crochet is a very special bug shop because, while her entire shop doesn't *just* consist of bugs (she has a wide variety of items and subject matter!), she does HELP bugs with her crochet! Specifically, she helps honeybees! She donates proceeds from some of her crochet work to honeybee research.

She has a whole section in her shop with one-of-a-kind freehand bees! They are designs she's made up herself without a pattern!
http://www.etsy.com/shop/SturmDM?section_id=5582273

Here are some of Doris's beautiful handmade bees:


BEE green, shop handmade this holiday season! :)
http://www.SturmDM.etsy.com


Also, BEE sure to check out her blog here- she ALWAYS has fun stuff to share!
http://CrochetinginGeorgia.blogspot.com


Tuesday, November 17, 2009

Featured Bug Shop #2: "Buggy Kids"

To continue with our theme of "Bug Week!" this week featuring wonderful handmade things from Etsy, I bring to you shop #2:

"Buggy Kids!"
Inspire a love of nature and bugs at a very, very early age-
her items are great for babies and toddlers! :)


These items for babies are truly unique and one of a kind!


The pillows have a soft, fluffy fabric on the back. Click on them to see the listing for more information!


Personalized initial onesie

She has great items in her shop and accepts custom orders, too!
Her official Grand Opening is coming soon- so check back often as she adds more crawly buggy items!

To see what she has on hand, check out her Flickr page:
http://www.flickr.com/photos/buggykids/

Enjoy and happy shopping!