
Since I started shopping at Staples and became a Staples Rewards member, I've saved a lot of money- and I want to share with you how perhaps you can, too.
(BTW, I don't work for Staples or have any affiliation with them!)
First, you have to be a Staples Rewards member. Becoming a member is super easy and you can even do it online- and if it wasn't super easy, I wouldn't've bothered... trust me.
Here's more info:
http://www.staplesrewardscenter.com
To get your quarterly rewards certificates, you must earn at least $10 in rewards each quarter... but that's really easy to do. Just keep these things in mind (this info is valid as of October 2009. Rules and promotions may fluctuate slightly from time to time).
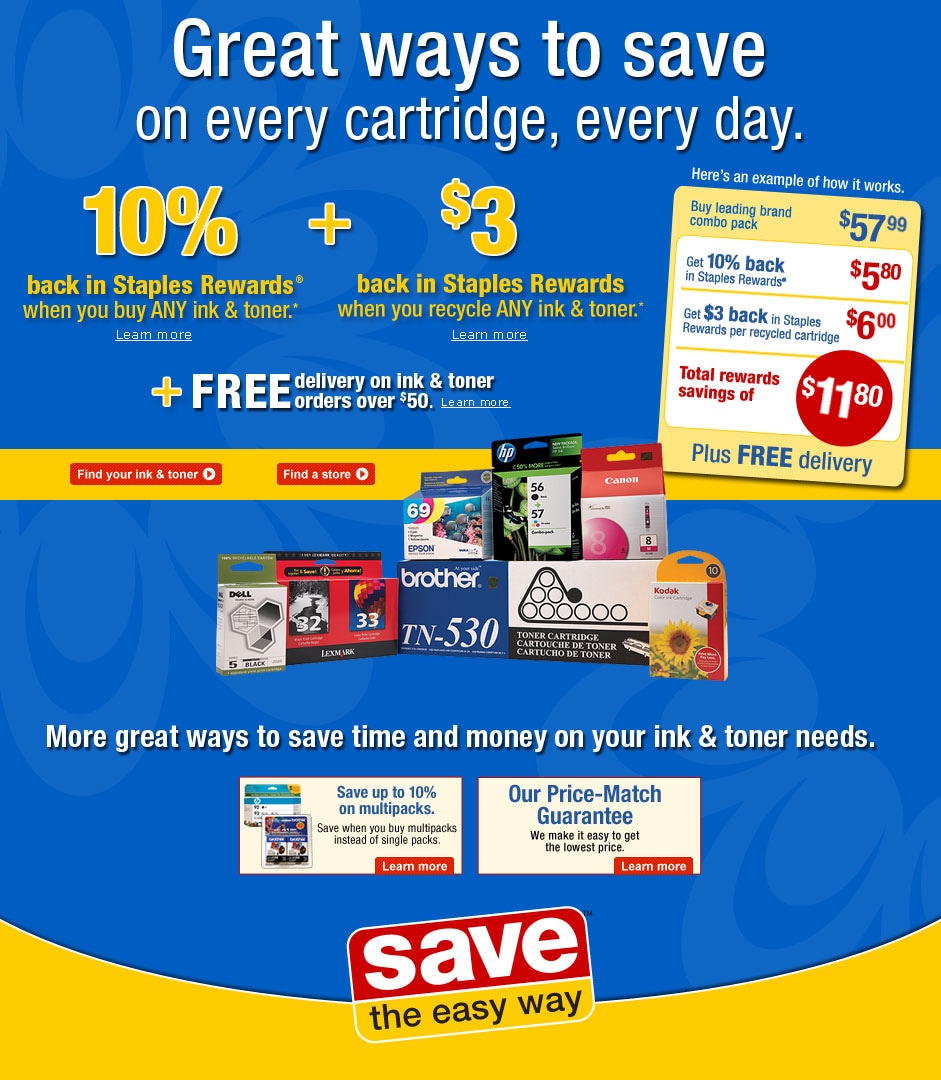
The simplest way you can earn some money if you do a lot of printing (like MEEEEE!) is by recycling your ink cartridges. Not only is this great for the environment, but your wallet as well! Staples will give you $3 in store credit (money you can spend at Staples) for each cartridge you bring in. (Note: You can't grab a whole huge purse full of ink cartridges and bring it in to cash in the mother load... They've got a maximum of 10 cartridges per calendar month. But that's $30 in rewards you can earn each month! )
You also earn 10% back on all ink/toner, case and ream paper, and copy & print services. So if you spend $100 on ink (not at all hard to do if you print as much as I do!), you'll get $10.00 in rewards. Staples will often run additional promotions on top of this... my personal favorite being 50% rewards back on copy & print services. So keep your eye on your local Staples' promotions!
I've ordered my greeting cards from several different companies. So far, GreenerPrinter.com and Staples are my favorites. When I get cards printed at Staples the fee is the same for 1 or 100 of a design. Staples charges $1.00 per 8.5" x 11" print. They have cardstock you can print on, but I prefer my Neenah Environment ecofriendly recycled stock. I purchase the paper and bring it into Staples for them to print my cards. (I do the folding, cutting, and buy envelopes.) If you choose to bring in your own paper, be sure you bring some information about the paper so Staples copy center can make sure it will be safe for their machines.
Another note- Staples ranked #20 in Newsweek's Top Green US Companies!
http://greenrankings.newsweek.com/top500
Let's add up some more savings! (Always fun, right?) If Staples is running their wonderful 50% Rewards back on copies and prints, and I have 50 greeting cards made, it costs me $50.00 at $1.00 per print. I get 50% of that back- $25.00! I can take that $25.00 and go get more cards made, or whatever else***(see below) I may want from the store.
A while back I thought about purchasing my own color laser jet just so I could print greeting cards. It would be a big expense up front, but might pay off in the long run as long as I'm making and selling cards. However, with Staples offering such great printing promotions, and me not mass printing my cards yet, I've decided it's cheaper to have them do the printing because I know for a fact color toner is NOT cheap! I wouldn't look forward to having to replace it (even with my 10% rewards back, hehe.)
 As a rewards member, you also get some pretty great deals via email. They'll send you their weekly ad, and once in a while you'll get a $5 off a $50 purchase, for example. They also often offer buy 1 get 1 free paper promotions. There are tons of ways to save- so if you do a lot of printing or frequently need color laser prints, I hope you'll find some of this information helpful! :)
***Coffee break...
Staples carries my absolute favorite coffee: Paul Newman's organic coffees. And no, it doesn't have a hellacious mark-up :) It costs the same there as everywhere else I've found it!
Rewards = FREE COFFEE. Score!


