Showing posts with label tulip. Show all posts

Tuesday, May 12, 2009

What a productive weekend!

I started my Saturday morning FINALLY making use of some of the packing supplies I've been hoarding since we moved (old sheets, towels, pieces of fabric, bubble wrap, paper wrap, huge plastic bags, the vinyl tablecloth from this post) and making a few Art Bags. I created them for transportation but they can (and will) be used for storage as well. Now that I'm doing 4 (or 5? I forget) art festivals this summer, I know my paintings and frames are going to take a beating in transport. And I hate that. I'm not going to buy a chinsy frame in case it might get damaged in transport, but when you spend a lot of money on a nice frame, you're constantly fretting over the fact that every time you go drive over a bump in the road, it might get hurt! Yikes!

Previously, I would wrap my art in bubble wrap and then some sort of fabric, but when packing up at the end of a show, you just want to hurry up and get everything taken down and loaded up and head home. And when it's raining you're trying to do it even faster. Bubble wrap just gets thrown around, a blanket or towel wrapped sloppily around the painting and then maybe an exposed corner sticking out by the time you've got them all loaded into the car. Not good.

For my transporting bags, I cut a section of vinyl tablecloth that would fit around the whole painting with enough room for a flap to hang down over the top, to protect it from rain and water. On the inside is a pocket of sorts, with padding in the front to protect the painting or glass. I sewed up the sides by hand because I wanted to roll them up and then use a very large stitch around the seams to try and keep it closed. I was able to make 3 small bags from one tablecloth and some shoe laces are currently keeping them shut. In the future I might add velco, but I am currently investigating other more ecofriendly options.

Next to my art bag in the picture above, is one of my small tulip tree studies. I finally got those all framed up, too. (Now they just need to have their bags made!)

I also finished up the green grapes in my 2nd grapes painting and on Sunday I gave the purple ones a 2nd coat. They'll need a few more, and I didn't finish that painting last week like I wanted, but I did get those other things out of the way that aren't a big deal but were definitely time consuming and on my "to do" list.

Since I probably won't continue to offer small prints (5"x7") as standard sizes at art shows (but will create them upon custom request), I printed, matted, and framed some small prints, too. I've got a lot of 5" x 7" frames around that are just sitting there empty, begging to be filled with some art. I framed one small one in a bright blue picture frame and was happy with the result, so I might paint some of the other frames I've got laying around here in bright colors and put a print in them. It will be great to bring them to shows this summer and see people's reactions to them- buying something already framed is obviously one less step for anyone to have to do, so people might like that! (I would!)


Since I'm almost done with my grapes painting, it's time to figure out what's next. And.... I currently have no idea. Or too many ideas? Tropical flowers are my favorite things to paint, but I like to highlight local things too. I've got a canvas that is 24" x 36" and this picture of passion flowers is just the right proportions for it. I'm not sure if this will be what I paint next, as I'm getting a little tired of looking at green and purple.

And lastly, I finally listed a print of the first grapes into my Etsy store.... Took long enough!


Let's hope that my next blog post is a picture of the finished 2nd grapes painting!!


Sunday, April 12, 2009

Great Green Frames and Ink Jet Papers coming your way.

I've been saying over and over that THIS will be the weekend that I finish my Tulip Poplar Flower paintings. One is very close to being done, the other two just need some more coats of paint on the flowers and then I need to work on the middles (the stamens? I'm not completely knowledgeable in floral anatomy). I was telling my husband how excited I would be if I could find reclaimed-wood frames for them, or something else eco-friendly... AND what a bonus it would be if I could find frames made from poplar trees!

Today was my lucky day because through Twitter, I found a GREAT search engine called The Eco Key. It's a Google powered search engine that puts an eco filter on your search results! Especially when adding the words "eco-friendly" or "green" to my search, I was getting much better results than using a the standard search engine (with no eco-filter).

So, through The Eco Key's engine, I found my frames on Etsy.com.
Behold BucksCountyFrames shop! They have lots of standard sizes and offer custom, too!!

Photo copyright from The Bucks County Frame Company:
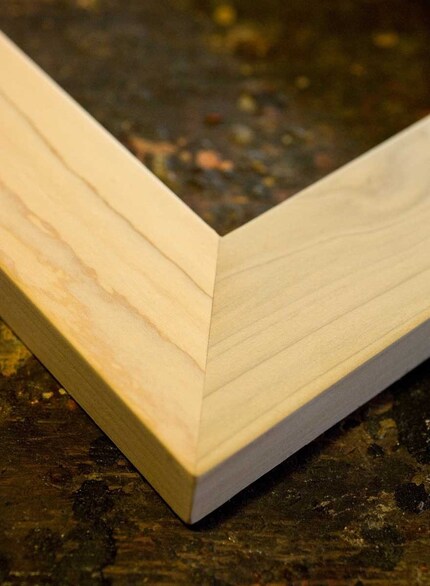
The frames I purchased.


If you're interested in eco-friendly frames, there are quite a few people on Etsy who make them, and some do custom sizes, etc. I did searches for "ecofriendly frame" (click to see the results of search), and "reclaimed wood frame" (click to see search results).


While I was playing around with the new search engine, I decided to look online for some good recycled and/or eco-friendly paper options to use with my new printer. I've got some Epson Ultra Premium Presentation Matte paper (I hear over and over that Epson printers are really designed to work best with their own papers) that I've used for some 8x10's and ACEOs and so far I really like it. But I'd prefer to find a more eco-friendly paper option- but only if it's going to make my prints look their best, and not ruin my printer.

I searched with The Eco Key again and found The Green Rooster which is Hahnemühle's eco-friendly paper line. They've got 2 bamboo papers and one made from sugar cane. 5% of the proceeds from the Green Rooster label papers are donated to environmental protection projects. After reading about the 3 different papers, I decided to order some made from sugar cane (here's some info about sugar cane paper and here's some cool stuff too) as it's a natural by-product and got some great reviews online.

It was a little tough choosing a paper though because you always have to wonder, which is best? Which is the most green? What happens to sugar cane by-products that aren't made into paper? If they would otherwise go to waste, then it's great to have found a use for them in a nice art paper. I also know that generally speaking, sugar cane farms have some bad effects on the environment too, though (as does almost all agriculture, sadly). But what about Bamboo... that would be a whole separate blog post, as bamboo seems eco-friendly but when you start really researching what goes on with it, at least to produce fabrics and things, it might not be so great after all.

That doesn't mean I love Bamboo (as a plant) any less.


Saturday, March 28, 2009

Rise up this mornin, Smiled at the risin sun, Three little paintings...

Well, in reality, there is NO sun to speak of today as it's completely overcast and disgusting outside. But the bright and filtered light coming in through the windows actually makes for perfect lighting conditions for painting, so paint, I did.

I've got the backgrounds on all 3 of them done, and the leaves on the top two are finished as well- they may need a little bit of tweaking and cleaning up. The leaves on the bottom piece need a few more coats.

These are 3 small canvases, 8"x10" each, and are studies I did from the three tulip tree photos I posted here. My original intent was just to do one big painting with focus on the flower, but before I tackled that, I thought studies might be a fun way to play with the colors and really get a feel for how I want the final big piece to look.

I added a lot more blue than in the reference photo to the top left painting, since the sky blue against bright green leaves is such a pleasing combination (thanks, Nature) and with an orangey-yellow flower in the middle, this color combo might be my favorite.

I saturated the browns a little more in the background of the bottom piece, as that photo was taken pointing directly into the woods, and I thought such dark colors might make the lightness of the flower pop more. The flower- the focal point of the painting- has a lot of orange in it, and I wanted to see how it looked to use a color in the same color family (time to get out your color wheels), rather than the complimentary color (blue), in the background.

In the top right painting, I used both the blues and the forest browns (and greens) to give the viewer a look at both sky and woods, which is what one would see when looking at low-hanging tree branches. The greens mixed in with the background are also a good indication of the time of year you can find these fabulous blooms- the end of spring, when the leaves on all of the trees have finally fully released themselves from their tiny little buds and everything is lush and vibrant, and the hazy intense heat of late summer is still months away.

I'm still not sure which background I'll go with for the final piece, as each has benefits. The blue background gives the piece a summery and almost tropical feel, and how could that ever be a bad thing!? But the view of the flower with the deep woods and sky in the background gives such an accurate representation of the environment in which these trees grow.

PS-
Don't forget about Earth Hour tonight!
Are you ready?
(I have no idea how people "get ready" to switch off electronics, but maybe there are some who have to have massive preparations in place to play Amish for an hour?)
but over on twitter everyone's "getting ready" so.... I better go make sure I'm ready, I guess.


Sunday, March 15, 2009

Flowers in the Concrete


I've been a busy bee!

In this picture, you can see how I've completely taken over and trashed the dining area of the apartment. (This is what happens when you don't have an actual art studio!!) But the good thing about having everything in the main area of the house is that it does force me to see it every single day, and also makes me want to hurry up and finish so I can clean up the mess :)

(But I'm actually hoping to keep this momentum going and not give myself enough of a break to clean up. We'll see how that goes...)


I'm working on the 2nd grape painting, but I'm not a fan of repetition so it's already boring me. Don't get me wrong, I think when it's done it will be nice, and I look forward to having a series. But my mind is already racing with ideas for new paintings, which doesn't help at all with the repetition.

So to alleviate some of this boredom/repetition, I've also started small paintings of the tulip poplar flowers. I had those three photos (see previous blog entry), and I like each of them- so I thought I'd do some small studies before tackling a larger size painting, which I eventually intend to do. Plus I have no small paintings, and I want to get into the habit of working smaller than 16"x20" on occasion because smaller pieces take so much less time to complete. The great thing about working on 3 at a time like this is that I can work on a section of one, put it down, work on a section of the others, and so on. By the time I've worked on all 3 of them, the first is already dry and ready for more.

THIS MEANS HOURS AND HOURS OF NON-STOP PAINTING.

I feel like I'm back in college!!!


Here is the progress so far. They're still a hideous mess for the most part, but I've printed out my reference photos and put a layer or two of paint on some of the leaves, and about 3 or 4 coats of paint on the backgrounds of these. I can see in the daylight today that the backgrounds still need more work.


Thursday, March 12, 2009

Oh, You Pretty Things!

I've wanted to paint a Tulip Poplar blossom for a long, looonnnng time now- as long as I can remember. Unfortunately about three years ago when it occurred to me to go take some reference photos, it was about a month after the flowers had come and gone. They don't last long at all, which makes the blooms even more special.

The following year (2007) I promised myself that I would absolutely NOT miss bloom-time, and thus kept a very watchful eye on a carefully selected Tulip tree (with low-hanging and easily accessible branches) in my dad's yard that entire spring.... waiting for the flowers. Exactly when they bloom depends on the harshness of winter, the warmth / intensity of Spring, rainfall, and of course a host of negative man-made influences which is pretty much a given with anything in nature now... but I digress.


I was able to capture these photos in mid-May, and the blooms- as usual- didn't last more than a few days, a week at most. I photographed them daily in various stages of bloom (okay, call it what it is: TREE SEX). You can easily see the differences in lighting/weather/time of day in these 3 pictures I have posted, and these are my favorites of the set. I'm looking at these 3 pictures as inspiration for a new painting. Or three.


Surprisingly, I actually have never seen this flower painted, although I'm sure somebody has had to feel the same inspiration as me and captured its glory with some form of artistic media.