Showing posts with label materials. Show all posts

Thursday, December 3, 2009

Basics of How to Make Prints (Part 2)

If you've moved onto Part 2 of how to make prints (digitally), hopefully that means you've got an image capture of the artwork that you wish to reproduce!

Once you have your image as a digital file, you can have prints made by a local print shop, or an online company, or make them yourself. Making the prints yourself is probably cheaper in the long run, but will require more of an investment up front (equipment, ink, paper, calibrating software if you choose to do so).

I now make most of my own prints, but when I first started selling prints of my art, I had my prints done locally or ordered larger ones from various online shops. Here are some of the online shops I've used with outstanding results:

www.imagekind.com
This site is great because you can upload lots of your images, set up your own online gallery, and it's free to join (there are paid memberships, too, with other benefits). Once your work is uploaded, you can just sit back and let ImageKind do the work when someone orders! You can customize the prices of your art and how much money you'll make from your prints. People can even order your work already framed, and the frame prices are very, very reasonable. You can customize and pick out the frame and mat combo for each piece of your art, or customers can also pick their own if they choose to do so. And, of course, you can order prints of your work from here to sell at shows and galleries.
My ImageKind gallery is here: http://SamanthasArtStudio.imagekind.com/

www.iprintfromhome.com
This is a pretty popular site for fine art prints. I've ordered giclee prints on Somerset Velvet paper from this website and have always been impressed with the quality. The more prints you order at a time, the cheaper each print becomes (a lot of print companies work this way).

www.canvasondemand.com
This is where I get all of my canvas prints made. A couple years ago when I started ordering prints of my art on canvas, I ordered from a few different companies to compare prices and quality. Canvas on demand wasn't the cheapest, but was the best in quality by far. After comparing 3 or 4 different companies, I knew there was no way I could order prints on canvas from anyone else. If I'm going to sell prints of my art, I want the absolute best that I can find, and these are definitely worth paying the little extra. I've recommended this site to numerous other artists because I truly feel they offer a superior product that you can really feel confident about. At art shows I've had a lot of other artists compliment my canvas prints- when you combine a quality canvas print with a great image capture, you'll get amazing results.

A couple notes about prints on canvas:
They are kind of controversial.... Some people (like me) love, love, loooove them. On the other hand, some will say "It's trying to be a painting but it's not." Prints on canvas can look so much like a real painting that it's hard to tell the difference. As someone without a ton of money to throw around, I love prints on canvas because they look so much like a real painting at a fraction of the price. I guess some people are afraid that if they buy a print on canvas, it'll be hanging in their house and a guest might make a comment like, "Ohhh, this is such a beautiful painting!" Then they will have to clarify, "That's not a painting, technically it's a print" and the sky will fall and all hell will break loose.

But here's why I love them so :)
When I was shopping at a fantastic artist's gallery in Montreal, the artist had her original works on display, and prints on canvas (in many sizes), and prints on paper (also in many sizes). As much as I loved her work, I couldn't afford an original. The canvas prints weren't cheap, but they weren't necessarily expensive, either. And the paper prints were nice- buuuut when you stood there in her gallery with a paper print in one hand (for, say, $30), and a canvas giclee in the other hand (for, let's say, about $90).... there was just no comparison. The canvas print was stretched and wrapped (no need to add in the extra cost of a frame), and the colors were so vibrant and rich- and it had such depth. Since I wanted something that looked as close to the original as I could get, I chose to buy the canvas print.

If you choose to make your own prints, take a lot of time and do plenty of research on different printers. There are so many out there and all have their own set of pros and cons! For example, when I was researching printers, I remember reading a lot about photo-printers and that certain brands are generally much better for reproducing black and white images. I knew I wouldn't be doing anything in black and white, so none of that really affected my decision on a printer. You may also want to check the costs of ink, and you can even find websites that break down square-inch cost of printing.
(Here is one that I've used: http://www.redrivercatalog.com/cost-of-inkjet-printing.html)

My boss at work had some great advice about buying a camper (I think it was a camper? Maybe it was something else entirely??) but the advice applies to many things in life, including buying a printer to make fine art prints:

"When you're shopping for a printer, buy your 2nd printer first."

All that means is, when shopping for a printer you may think "I'll buy a cheap printer for my
first one and then just buy a better one later." Naahhh. Buy the best that you can afford first- this will end up saving you money. There's no reason to have two printers, one that works pretty good and your super-awesome-high-quality-fancy-pants printer. You'll easily drop $150-$200 on a printer that works decent, but why not put that $150-$200 toward a really, really good printer?- Some of which start at just $350-$400? (And go up- way up- from there.) Plus if you figure out exactly which printer you want, you can take your time and hunt around for a good sale. (And don't forget, you can also look for one used!)


Sunday, November 22, 2009

Basics of How to Make Prints (Part 1)

Online or at various art shows, I'm surprised by the number of artists who ask me, "How do you make your prints?" Coming from a Graphic Design background in college, I've done it for so long now that I take it for granted!
Since it's such a common question, I thought I'd make a blog post (or, two) about it. Hopefully other artists out in the Wide World of Internets will somehow stumble upon this post and find it useful.

(This post is about making digital prints from a computer, as I'm definitely not educated in the other traditional methods of printmaking. I'm also assuming if you're going to a pro to have it done, they'll know what file type to save it as- and if you're doing it yourself, you're computer savvy enough to know about different file formats.)

*** If you've got questions after reading this, feel free to ask them in the comments section after this post or email me. ***

There are 2 main steps in creating a print from your original artwork:
#1. Obtaining the image capture as a digital file.
#2. Printing said file.

The methods of doing these two things and all of the in-between is where you really get into the nitty-gritty.

Since this will be a little long, I'll make it a two-parter. This, part one, will focus on the
IMAGE CAPTURE.
There are a number of ways to get an image of your art onto the computer.

If you're not computer savvy...
The easiest way for those who are not computer-savvy is to take your artwork to a business who specializes in this very thing. You'll have to check your local (or in some cases, not so local) listings to find a place. For example, the best place I've found is about an hour and a half away: "American Art Associates" in Annapolis, MD. Most printmakers will do an image capture for you: You bring in your art and they essentially put it on an easel and take a very high resolution photo of your image. Their lenses and equipment eliminate glares and shadows. They put the picture onto their computer, adjust the color if necessary, do whatever other magic they do (I've never been part of this process) and save it. From there you can have them make prints for you, or you can ask them to save it on a disk for you for later use.

Pros of taking your art to a printmaking business for capturing the image and making prints:
1. These guys (and gals) do this for a living. This is what they get paid to do. If you're going to a reputable place, you can tell them what you want, sit back and relax, and they'll handle it AND make sure it looks great!
2. It's a lot easier than doing it yourself, aaannnnnd....
3. Much less time consuming than doing it yourself.

Cons of having a printmaker capture the image for you:
1. It can be expensive (depending on what your idea of expensive is...). An image capture of a large (over 11"x14") artwork, from my experience, can run $50 to $100 - maybe more. But since doing it yourself can be quite time consuming, having a professional capture an image of a large/difficult to photograph artwork is often well worth every penny.

Or try a little DIY.
If you are computer savvy and have some graphics software (Paint-Shop-Pro, PhotoShop, a myriad of others), you can try doing it yourself.
You can buy a scanner (they're pretty affordable, $100 and up) and scanning software (which should come with the scanner), lay your art on the scanner, scan it & import the image into the computer, and then save the file.

Pros of scanning it yourself:
1. After purchasing a scanner, it's basically free.
2. No driving around or making appointments- do it at your leisure.
3. If the artwork is 8"x10" or smaller and not glossy, it's a fairly simple and straightforward process. Lay it on the scanner. Open your scanning software. Scan it in. Piece of cake. (You can even eat a piece of cake as your scanner imports the image.)

Cons of scanning it yourself:
1. It can take up a lot of time. So even though the process is free, is it worth your time to sit and fool around with it?
2. If you've used glossy paint.... forget it. If your paint has any gloss to it at all, the light from the scanner is going to reflect off that and make white highlights. No good. And no simple way (that I know of) to fix it.
3. Large pieces can be a huge pain in the ass and take a very long time. When I have finished a 16"x20" painting (which is not that big), it takes me at least 4 scans to scan it in. Most scanner beds are about 9"x 11". Even an 11"x14" artwork will take about 4 scans to piece everything together all nice and neat.
Oh, and that whole "piecing together" process? That can take HOURS. And you need good graphics software to do it, too. Sometimes the colors in each scan might vary slightly. Sometimes you get shadows along a gutter (where your painting overlaps the edge of the scanner bed). Sometimes you've laid your artwork down slightly off from a 90-degree angle, so you might have to do a little rotating to get it to fit. The larger your artwork, the more scans you have to do, the more opportunities for unwanted shadows, rotations, overlaps, etc. It ends up being almost like putting together a puzzle.
(I scan most of mine myself because I'm cheap like that, and since my favorite place is an hour and a half away, I have to do a bit of planning to allow myself time to drive over there. Plus gas money of course, blech. Again, I'm cheap.... When I can afford to be. Meaning that if I've got an painting that is huge, I'll gladly pay to have it done. I'll emphasize again that it is worth every penny.)

UPDATE: I've now created a post about how I scan in my paintings! It's here:
http://samanthasartstudio.blogspot.com/2010/07/how-to-scan-in-painting.html

Some artists have mentioned using a digital camera and taking a very high-resolution photo of their artwork themselves. You can try this if you've got a nice digital camera and, again, a little bit of graphics software. Be sure to *not* put your artwork in direct sun- it will be too bright and have much to much glare. Ideally, you want a bright but overcast day- or, if it's sunny, you want the art to be out of direct sunlight but in a bright place. No shadows.
Pros of using your own digital camera:
1. None of that scanning/piecing together business if you've got a particularly large painting or drawing. Woo hoo!
2. If you're out of the sun, no worries about glossy paint or shadows.
3. Affordable... obviously. (Unless you go buy a very expensive new camera!)

Cons of using a digital camera:
1. If you've got a very large painting, you're going to need to take a photo at very VERY high resolution to make large prints from the painting.
2. Wobble? You might need to use a tripod to take the best photo possible.
I've tried the digital camera method- admittedly my camera is almost 10 years old. I took photos of some paintings but the largest I seemed to be able to print them and make them look good was only about 8"x10". I'm by no means an expert on this method and I'm sure digital cameras have come a long way in the last decade!! If you've already got a camera and some software, you might as well give this method a shot and play around with it, decide for yourself- it couldn't hurt.


Okay, so by this point you have your image saved as a file. Now what?... See Part 2 :)
Coming soon!


Wednesday, May 27, 2009

Outdoor Art Show Advice, part 2- Display Walls & Panels

This blog post started life as a Squidoo Lens, which you can find here:
http://www.squidoo.com/OutdoorArtShowInfo

I wanted to take the information from that page and elaborate on it a bit.
My blog is mostly geared toward 2-dimensional artwork, therefore this post is mainly weighing different options for walls and panels on which artists can hang their artwork.

However, this Flickr pool has lots and lots and LOTS of ideas for displays, booths, tables, indoor and outdoor, for anyone who wants to do craft shows! You may want to bookmark this and refer back to it from time to time.

http://www.flickr.com/groups/craft_fairs/pool/

Now that you're overwhelmed with display ideas...!!

My advice for finding a tent (if you decide to purchase one) applies to panels, too:
Look for used!
Save money and be eco-friendly! Or if you can't find used, start with a few new panels, and keep your eye open for good deals on used ones and snag them as you find them.

Craigslist

Pro-Panels Trading Post
Pro-panels are sort of what I refer to as the "Rolls Royce of Art Show Display Panels." In my opinion they're the best of the best! They're expensive though, but the company is very helpful in putting up a forum on their own website where people can look for used panels to buy, or sometimes rent.

The Wet Canvas Swap Shop
This is a forum from the WetCanvas art website. There are mostly art supplies in this forum, but you may be able to find display equipment too.

Ebay
Check Ebay for good deals on both new and used craft show supplies.

There are so many manufacturers of panels out there. You can set up your booth in so many different ways, too! Walls on 3 sides, walls and miscellaneous walls that stick out and about, making your booth a little like a maze (but in a good way), or just a wall in the back. If you can, you may want to go visit an outdoor art show and take a look at different booths. Decide what you like, what you don't like, or if you notice a trend (such as, most artists tend to leave a space open in the back where they can put their chair and desk and sit, out of the way, but still be accessible to customers), take note of it, and factor that into your layout.

I'll price these out by panel, and give you a few more pricing options for walls and booth as well. For these below, cost and wall size is figured for a standard 10'x10' booth.

Pro-Panels
Carpeted, lightweight, heavy duty VERY nice looking panels.
I've talked to artists who have been using these for over 10 years. They are highly recommended (and my panels of choice). However I couldn't afford them for my first show, so at that time, I made my own (scroll down and you'll see!). But these are definitely worth the investment. There are also a lot of different size options and colors available, too. They offer panels that break into two pieces and fit into most sedans- NICE! The cheapest options for a wall would be to get 3 of the 38.5" wide panels (6 or 7 feet tall, do not break apart), at $115 apiece, $345 for a wall, $1,035 for 3 complete walls (doesn't include shipping).

My current booth, with Black ProPanels. I use shutters (found at any hardware store) to display greeting cards.

Armstrong Panels
Carpeted, lightweight, heavy duty VERY nice looking panels.
Different break-down options, again for smaller vehicles. Also come in lots of different colors. For "The Gallery" panels, 38"wide x 7' tall, the cost is $125 apiece. You need 3 to complete one wall, so the cost for a single wall would be $375. For 3 full walls of a 10'x10' booth, $1,125 (doesn't include shipping cost).

Graphic Display Systems
Metal mesh panels that you can use as-is, or purchase fabric covers for them. The metal mesh is also really good in the wind, as it does let the wind pass through it.
Fabrics are offered in different colors or if you're crafty, you can make your own covers! I have talked to artists who have used these for over 10 years as well, and the panels still appeared to be in very, very good shape. These are also offered in break down options for smaller vehicles. For their Standard (non-break-down) 37.5" x 6' panel, each costs $75. Again, 3 are needed to complete 1 wall, so $225 for one wall, and $675 for 3 walls of a 10'x10' booth. Not sure on the cost of shipping for these.

I've seen a lot of different options for covering these, including burlap or bamboo mats for a natural look. Your options are almost limitless! Go crazy with creativity!

Here is the site for the covers you can order:
http://www.flourish.com/graphic_display_covers.html
DIY El-Cheapo Panels
Lowes or Home Depot or your local hardware store.
Miscellaneous PVC pipe and garden wire. You would want to cover this with fabric, trust me. You can try and design your panels to the same sizes as the Graphics Display Panels and order covers from
http://www.flourish.com/graphic_display_covers.html
(or order a cover first, and see if you can create a panel to fit in it.)

When I did my first show, I used PVC pipe costing about $12 for all of it, duct tape costing maybe $8 , and garden wire at about $30 for the roll I needed (and I still had a lot left over). I spent maybe another $12 on fabric to cover it- pretty cheap.


Supplies for panels all laid out...

First frame constructed. I constructed my own break-apart panels so I could fit them into my car. I would give you more info such as measurements, etc. but I made an error when I made these, and instead of a 10-foot long wall, I ended up with a wall more like 11 feet. This wasn't a bad thing, as I ended up angling the panels to compensate for the extra space.

These panels were made with PVC pipe frames and garden wire duct taped to the frame,
then covered in fabric.
I angled the panels so that people coming from either direction could see as much of my work as possible, since I didn't have enough panels to cover 3 of the sides.


Lowes also offers white plastic lattice or pegboard, which are other popular options at shows!
Once you have your panels, do a test run. There will be a learning curve in setting them up, and you want to be as relaxed as possible on your big day! Set them up in your back yard, or in a parking lot that isn't busy- somewhere that you can have room (and time) to lay everything out and really learn what works best for you.


Thursday, May 7, 2009

Sugar Cane Paper - EcoFriendly Fine Art Paper review

I got my Hahnemuhle Sugar Cane paper in the mail a few weeks ago! The company from which I bought it sent it in this GIANT box with about a million inflated plastic protection bubbles, and my husband commented that just in the packaging alone, I probably undid all the energy and resources I was trying to save by investing in an eco-friendly paper.
Sadly he's probably right :(


The official website is here:
http://www.green-rooster.com/
And a quick overview of the product can be found here:
http://www.green-rooster.com/site/us/46/products.html

This is a new inkjet fine art paper. It's made from a by-product of sugar cane processing
(bagasse). 75% of the content consists of bagasse fibers, 25% consists of recycled content made from the company's paper trimmings. To produce the paper, Hahnemuhle is using renewable energy.

Hahnemuhle is also donating 5% of the sales from the paper to environmental protection projects!

Although sugar cane farming itself isn't very good for the environment in most cases (the usual: hacking down more and more natural habitats to grow the stuff, then dumping the fertilizer and pesticide chemicals into water sources, yuck), using a by-product to make a paper is still better than having to create a brand new source for it, which is why I chose this paper over a bamboo paper.

I was very impressed with the quality of the paper upon opening the box.

-It's quite thick! I've never used a fine art paper made specifically for inkjets, so I wasn't sure what to expect. It's 300 gsm: Metric for grams per square meter. I learned something new as I never really paid attention to paper weight before, I just bought what was recommended or what looked and felt nice or seemed appropriate for what I was doing with it!

-It has a texture to it, too, and again since I hadn't used that kind of paper in an inkjet before, I couldn't imagine the image would come out looking very nice- even though the paper IS specifically designed for use in inkjets. Boy was I wrong! Obviously the paper is meant to be used with inkjet printers but until you see for yourself how it looks, at least for me, it was hard to imagine a perfect image reproduced on paper with that much texture.

-It has a warm tone to it. If you tend to leave white space around your print, inserting it into a bright white mat may make the warm tone of the paper stand out- something to consider.
I do not usually leave white space around my images, but I do think sometimes that looks nice, so I will have to keep that in mind.

One concern I have is that I'm using an Epson printer and I always hear that Epson printers work best with Epson papers (go figure). I just hope that if I start using the bagasse paper on a regular basis as I plan to do right now, it won't have any weird long term effects on my printer.

Aside-
I also have to admit that a couple of years ago when I first started researching making my own prints, I saw the
Hahnemuhle name (which at the time I had never even heard of) being dropped all over the web by the snootiest-sounding of artists. I remember reading paper reviews and forum discussions about different papers, and some artists would jump in and make snide comments about any other papers being discussed, saying they would ONLY use Hahnemuhle and everything else is just worthless garbage, etc. To be honest, talk like that sort of turned me off to it because a lot of artists recommending it sounded pretentious. I looked up this company-with-the-impossible-to-pronounce-name anyway, and I was in for a surprise! Their papers cost WAY more than anything I was considering using.

Fast forward to last month, when I researched eco-friendly archival quality art paper options. There they were... That fine art paper company from Germany with the long name that started with an 'H.' I was intrigued. I remembered all the things I had read before, but I decided to order some and see exactly what all the fuss is about. And now I know.
Turns out there's a reason people speak so highly of it. I'm not going to say HP or Epson or any other papers are crap though, because that's not me, but I will say that now that I've tried this paper and know it has a good name and great reputation, and will last a long time, I see it as a great investment for my prints and it would be hard to go back to anything else for my art prints!


Sunday, April 26, 2009

Artists! Who likes free stuff? Tips for package reuse.

I haven't posted much about art in a while, but this was a post that's been bouncing around in my head now (as most things do...) for a while. Since yesterday was the Mechanicsburg Earth Day festival, I'm still feeling a green streak, so it's time to formulate this post.

A lot of people have heard the term "Starving Artist." I'm not too crazy about that term, probably because it brings back all-too-vivid memories of college and having ONE art store in town that could (and did) charge an arm and a leg for everything, and with Flagler College's art students 2 miles away, it was like shooting fish in a barrel. Art supplies cost WAY more than food, and at the time, seemed much more necessary. (But you could still always find beer money... Ramen noodles + Art supplies + Cheap beer = unofficial art school budget.)

I digress. Since everyone's looking to save money, especially artists in college or just starting out, here are some simple ways you can reuse things for your art/art business.


1. Vinyl tablecloth with fuzzy flannely backing.
This bad boy was 2.99. Pretty cheap. These tablecloths are practical if you're throwing a party, but the bad thing about them is they tend to rip. Once it has a rip in it, what do you usually do with it? Toss it? I have another idea- use it to protect a painting in transport. After you wrap your painting with whatever you use (preferably something reusable like foam), wrap one of these around it. If there is humidity or rain wherever you're taking it, the vinyl is waterproof and will protect the painting. The fuzz on the back won't hurt your frame, either. I plan to experiment with attaching velco to it and making a pocket that will stay in place around my artwork and can be resized for various paintings.

2. Envelopes
This one is simple, but you can keep some old envelopes around for receipts. You can easily organize them by month, or by art show. For a while I was using folders but I was going through them quickly and always running out. Now I can use envelopes from cards to organize receipts by month or show and then have a folder for each year. A very simple tip, so simple many may not have thought of it!

3. Empty tubs
These have about a million uses! Transporting dry kibble for your pets during travels. Offering leftovers to family or friends after dinner to take home (no worries about getting them back). And of course, holding your paintbrush rinse water while you paint! You can keep a few in different sizes and use them all at once, with separate bowls for each color you're working with, etc.

4. Miscellaneous plastic packaging
I know ideally it's best to just avoid this altogether. But sometimes when you're limited to what your grocery store has to offer, it's hard to get around it (hello... do you like berries?). These containers have a lot of uses, too. The smaller packages you can use to store small things like business cards, price tags, ACEOs, framing hardware, small tools. If they have ventilation holes and you want to keep the water out, you can store the plastic container in a heavy plastic bag from your cereal or potato chips. Wash all of these out as best you can to avoid oils or food residue. Wrap it in a rubber band to keep it tight.

5. Medicine/prescription bottles
If you tend to work with smaller quantities of paint at a time like me, you don't need a giant storage container for custom colors. I'm not sure how reliable most of these bottles are for long term color storage... The bottle on the right was left over from a prescription for my cat. I mixed some paint in it more than a year ago and planned to use it up within a day or two. I didn't use all of it, but surprisingly the paint in there is still wet and seems usable. Not sure I'd want to use it after a year, but it's nice to know that I could count on it to hold a color for at least a week or two.

6. Vegetable containers
Again, I know, avoid these- but if you're a big fan of mushrooms and the loose ones are all sold out, you might end up taking one of these containers home once in a while. These make GREAT palettes, as you can see from the used one! The paint will build up in them after a while, so they do have a finite life span (as far as I can tell). I like that there are many different kinds, and the green one has nice little pockets that are about 1/4" deep, so they'd hold a decent amount of paint and would be good for mixing it, too.

Do you have any tips you'd like to share in things that you reuse (art related, or not)? If so, please leave a comment! :)

Have a great week, everyone! I'm out of town for a few days and might not be posting while I'm gone.


Sunday, April 12, 2009

Great Green Frames and Ink Jet Papers coming your way.

I've been saying over and over that THIS will be the weekend that I finish my Tulip Poplar Flower paintings. One is very close to being done, the other two just need some more coats of paint on the flowers and then I need to work on the middles (the stamens? I'm not completely knowledgeable in floral anatomy). I was telling my husband how excited I would be if I could find reclaimed-wood frames for them, or something else eco-friendly... AND what a bonus it would be if I could find frames made from poplar trees!

Today was my lucky day because through Twitter, I found a GREAT search engine called The Eco Key. It's a Google powered search engine that puts an eco filter on your search results! Especially when adding the words "eco-friendly" or "green" to my search, I was getting much better results than using a the standard search engine (with no eco-filter).

So, through The Eco Key's engine, I found my frames on Etsy.com.
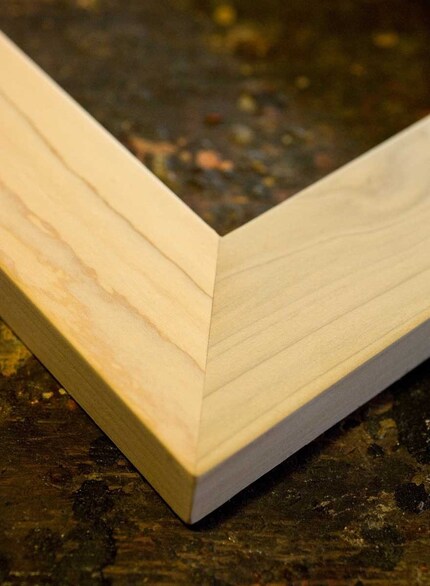
Behold BucksCountyFrames shop! They have lots of standard sizes and offer custom, too!!

Photo copyright from The Bucks County Frame Company:
The frames I purchased.


If you're interested in eco-friendly frames, there are quite a few people on Etsy who make them, and some do custom sizes, etc. I did searches for "ecofriendly frame" (click to see the results of search), and "reclaimed wood frame" (click to see search results).


While I was playing around with the new search engine, I decided to look online for some good recycled and/or eco-friendly paper options to use with my new printer. I've got some Epson Ultra Premium Presentation Matte paper (I hear over and over that Epson printers are really designed to work best with their own papers) that I've used for some 8x10's and ACEOs and so far I really like it. But I'd prefer to find a more eco-friendly paper option- but only if it's going to make my prints look their best, and not ruin my printer.

I searched with The Eco Key again and found The Green Rooster which is Hahnemühle's eco-friendly paper line. They've got 2 bamboo papers and one made from sugar cane. 5% of the proceeds from the Green Rooster label papers are donated to environmental protection projects. After reading about the 3 different papers, I decided to order some made from sugar cane (here's some info about sugar cane paper and here's some cool stuff too) as it's a natural by-product and got some great reviews online.

It was a little tough choosing a paper though because you always have to wonder, which is best? Which is the most green? What happens to sugar cane by-products that aren't made into paper? If they would otherwise go to waste, then it's great to have found a use for them in a nice art paper. I also know that generally speaking, sugar cane farms have some bad effects on the environment too, though (as does almost all agriculture, sadly). But what about Bamboo... that would be a whole separate blog post, as bamboo seems eco-friendly but when you start really researching what goes on with it, at least to produce fabrics and things, it might not be so great after all.

That doesn't mean I love Bamboo (as a plant) any less.


Thursday, April 2, 2009

I walk the line...

As I've tried harder and harder to incorporate "green" into my artwork and art business (prints, packaging, etc.), I'm starting to realize that archival and environmentally friendly are damn near mutually exclusive. It seems that I am walking a fine line between them. When you can find environmentally friendly art supplies, the sizes or colors offered are extremely limited.

After a few customers asked me about making ACEOs, I recently decided to create some. Last year these little cards were immensely popular in the art community, and with the economy being in the toilet/people not wanting to spend a lot of money on things, I would wager they will remain popular for at least another year or two as they are small and artists can make them quickly and cheaply. Plus, it's tiny collectible art cards... Tiny is FUN!

So to package and sell ACEO prints, you can put them into a clear sleeve with backing board just like you would do with any other print. But getting a bunch of new plastic sleeves just to encase these tiny prints seems a bit wasteful. And, I can't find bags in the proper size that are environmentally friendly at all.

Some artists are using baseball card holders/sleeves to display their ACEO prints. These are a little thicker and more sturdy than your standard plastic sleeves for prints, and are almost always archival quality as collectors don't want their cards to deteriorate in quality. After an exhaustive search, I came up with no recycled content or biodegradable baseball card holders.

Some people on Etsy are incredibly creative with their packaging! Etsy sellers are using everything from cereal boxes (cut to size then taped together to make a sleeve), to fabrics, to recycled mailers and other recycled packaging.

I love the idea of the recycled cereal/snack boxes for shipping, but I still need a nice way to display the cards for art shows, galleries, etc. Hmmmm.....


Monday, January 12, 2009

More Green Art Stuff!

For the last few years I've struggled a little bit with the fact that acrylic paints are NOT eco-friendly by any means. While I do work with colored pencils once in a while- and I do love them and have noticed many eco-friendly ones to choose from- I just can't trade painting for drawing.

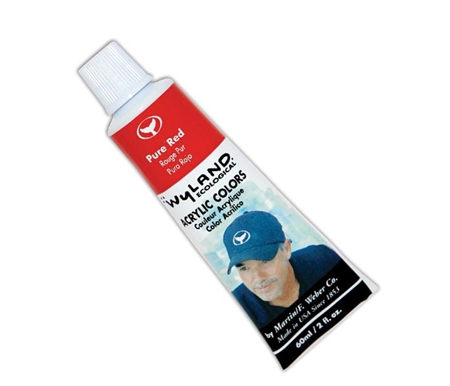
Well...... I recently found out about these:

The artist Wyland has his own show that's only 30 minutes long and he shows you how to do a whole painting in that time. It's awesome. At the beginning of the show, you see a list of the tools Wyland is going to use in that episode, and on that list would always be "Wyland Ecological Paints."

Apparently, these are environmentally friendly acrylic paints! At the end of his show, Wyland always mentions something about the oceans and the environment and how we all need to do our part in protecting them. I need to do a little more research and find out *what* it is about the paints that's environmentally friendly. Is it the ingredients? The way that they are made? Does the factory in which they are made run on solar or wind power? Is the packaging made from recycled materials?
Hopefully the answer is yes to all :)
And if not, we can hope that that's not too far off!

For now, since I know of the three R's (reduce, reuse, recycle), reducing is the most important, I will stick with trying to use up all the paints I already have before diving in (HAHA!! Get it!?) to the Wyland paints!

(PS... Maybe by then Wyland will have added a Hooker's green to his catalog of colors.... pleeeeeease?)


Sunday, November 16, 2008

A Product I'm So Excited About!

Check it out... Bio Bags!
http://www.clearbags.com/?category|BIOBAGS


No, these aren't biohazard bags or the bags you use to dispose of sharps. They're clear sleeves for art (or whatever else you want to put into them). What's so damn great about them is that someone finally made use of the biodegradable compostable plastic technology for the bags artists slip over their prints.

I had sought out a more eco-friendly option for enclosing my prints earlier this year, and clear plastic seems to be the only thing that makes sense to use. I researched compostable/ecofriendly plastic sleeves and found some- maybe made by the same company?- but I seem to remember the biggest size being offered was approximately a 5" x 7" bag. Now they offer them big enough to enclose a 16" x 20" piece of art. How perfect is that!?

Thanks, EarthFirst!
They are doing all kinds of great things with ecofriendly plastic films.


Tuesday, September 23, 2008

Advice for Arteests: Part 1

Scoring, Folding, & Cutting Cards

While I'm in the mode of doing 2 art shows back to back, I'm doing a lot of preparation. I figured as I'm doing so, I should write it down- first of all, so I don't forget how to do it next time, and second of all, because maybe it will help someone else who needs some guidance.
Me giving guidance? Eh, despite what you may think, hell has indeed not frozen over...

So, here is how I scored, folded, and cut out all my cards for Artsfest, and how I will do so tomorrow night in preparation for Neptune this weekend.

Supplies- You will need:
  • Paper cutter (mine was around $90, you can find them at a reasonable cost)
  • Hard, flat surface and something thin and flat to protect that surface- like a magazine
  • Non-serrated butter knife
  • Rula
  • Something somewhat rounded that you can press down the crease with, that won't damage the card- I used a measuring spoon
  • Good music to listen to
  • Recepticle for card trimmings, preferably your recycle bin!
  • Your cards, silly
  • Probably a glass of wine or two, at your own risk of course *
*Consuming alcoholic beverages and using a paper cutter might not be the most intelligent combination known to mankind.... However, there wasn't a warning on the bottle or anything, so it must be ok.
Cool.


Now you're ready. Chug your first glass of wine and let's begin. Yes.. At your own risk.

Step 1: Lay down your magazine on a kitchen counter or other hard surface. Place your card on top of that. Align your ruler so that it's touching or very close to touching the graphic on your card- if your graphic doesn't have a full bleed, it's going to be a little more tricky, obviously. So in my example I'm using a card with a full bleed cause it's easier to 'splain.


Step 2: Now take your non-serrated knife and run it along the edge of your ruler. Hard. Do it back and forth a couple of times- hard enough to get a good, straight crease in the paper. If you start seeing dust and shreddings of paper flying about, you did it too hard and your card is now rendered useless- but no worries, continue on with this card as though you did it correctly the first time and use it as your guinea pig. (Is PETA going to be pissed that I said that?? ....Cause we're going to cut it up in a minute.)


Step 3: Now fold your card along the crease you just made- you can lay it down on your flat surface and just press down on it with your fingers. Next, pick up your blunt object
No.
Not that.
Put that away till you're done with your cards.
Ahem.

Pick up whatever round/blunt tool you chose for pressing on the crease. Run it firmly along the crease a couple of times and get it nice and flat.
Sweet.


Step 4- Now for the fun stuff! Place your card on the paper cutter and cut off all the excess paper around the edges. I line up one of the graphic edges with the paper cutter edge and lop off an extra 1/16" or so- no one'll miss it. Then repeat that for the other two sides.

Folding your card before cutting it means no little white edges peeking out from the sides of cuts that weren't too straight-and if you are having wine or anything, or if it's 2:AM, or both, you need all the help you can get.


Sunday, September 14, 2008

My Favorites!


AWESOME!

Here are my two favorite paintbrushes. Aren't they the best?! Look at them! They're so perfect. (and by the way, is there any flower that exists that's more perfect than a Dahlia? Seriously.)

The brush on the left, that's one I got fairly recently. I got it sometime this past summer to help me with Palmera Del Coco. I needed something firm yet flexible, skinny and straight: Behold. I think this paintbrush, with a little help from me, painted every single palm frond on that tree.

The one on the right, that's one I have had for 10- yes, TEN- years. I got that one back in college. Back when I was totally poor and couldn't afford most of the nice brushes- as in, for me to consider it unobtainable, it would have to cost more than $10.
I remember I was back in good ol' Design I- AKA the make-or-break class for art majors. We were doing a project known as "The Color Chart." I had gotten this big, thick, fluffy brush and the thing was pretty much useless for The Color Chart, so I knew I had to go find a new brush.

The local art store has a history for totally ripping off the college kids, as it's the only one in town. That's gotta be the norm for any small town with an art college and ONE art store, I guess. I went over there wondering how I was going to be able to afford a new brush and for some reason, this one had been marked down. The little plastic sleeve that goes over the bristles for protection was missing and maybe that was the reason for the markdown? No matter, it was $6 and it was coming home with me!

Thanks to that brush, I was able to get an A on The Color Chart, and an A in the class.

Thanks, paintbrushes!!


Today, to show my appreciation, we'll go tomato harvesting!! Yum! Look at those beautiful Romas!


And some butterfly watching this afternoon. Ohhh, so pretty!

Maybe the two of you should get together. Wouldn't that be nice? We can have a paintbrush wedding for you, since you're so perfect together. You can start a little family.... Make some little baby brushes... Take family trips together outside to paint Plein Air...


Friday, August 8, 2008

It's not easy being green..... :(

In my last blog post, I wrote about ordering some business cards from www.greenerprinter.com . I'm very excited about them, but it also got me thinking about what else I can "green." Especially related to art.

Sure at home, I recycle even the tiniest scraps of paper (to the point it probably drives my husband a little nuts). I compost veggie/fruit scraps, coffee grounds and filters, drier lint, and sometimes tissues- with the amount of tissues I go through, I could never compost them all as I'd end up with about 80% of the compost pile being nothing but tissues. I'm pretty sure the compost dwelling roly polies and worms would not be amused. (And we can't have a yard full of displeased roly polies and worms.)

With artwork, it's a little tougher. Until recently, it was really hard to find archival paper that had any recycled content (and I still hear artists debating, "can it REALLY be acid-free?!"). When shopping for paper, I find myself going in circles, asking:
Which is better..... To buy non-bleached/chlorine-free (is that the same thing??) paper with 100% post-consumer recycled content produced by only wind or solar power?
Or buy all new archival acid-free paper made from organic free-traded cotton or bamboo or hemp- or any of the other plants they're using now?
Which is the BEST option?
IS there a best option?


And then there is the printing.

I looked online for a company to order some greeting cards from. Ohh, look, such-and-such a company will offer solar and wind powered production and 100% post consumer recycled cardstock and use soy inks.... and you have to order at least 500 cards (of the same design) at a time.
...For only $250!
Plus artwork set up fees and shipping and handling and did we mention tax and don't forget to add extra if you want the cards cut to the proper size and if you'd like them folded too, please include your first born with payment thank-you-very-much.
(While that's a great deal and all, when you've got 20 or more designs to have printed, that just isn't practical in most cases.)

Would you like envelopes with those?
Organic free traded cottonhempbamboo blend, or 100% post consumer recycled content?


Aaarrrrrgh!

And-- why do they have to cost that much if the production is being handled by wind and sun? Huh? Huh? Aren't those FREE??

::peeks outside::


Thursday, August 7, 2008

Been busy, but...

I did just order my new business cards from www.greenerprinter.com . YAY!! I have been perusing the samples they sent me for at least 6 months now, and since I've got at least few shows coming up, I figured I better hurry up and order some. I can't wait to get them!

The samples I have from greenerprinter are gorgeous- great paper and great inks, I love everything about them. The cards I ordered are 100% recycled and printed using soy inks.

Neat!

When will they make soy inks for my home ink jet? WAAAAANNNNNNT!!!!


Sunday, September 30, 2007

Some of my past news...

September '07- Artsfest In Yo Face!

Artsfest was such a great event and I hope I will be able to do it again next year! The weather couldn't have been better- it was absolutely perfect. The rest of this month I'll spend finishing up a couple of paintings, and switching around my inventory in the restaurant, coffee shop, and galleries.


August '07- Getting Ready for Artsfest


That's right! Just one more month until Artsfest 2007 at Ann Marie Garden in Solomon's. I'm excited. . . and nervous. . . and have no idea what to expect, since unfortunately I've never been to Artsfest before.

In preparation for the show, I'm working on my display and hand cutting tons and tons and tons of mats for prints and framed pictures. Cutting my own mats sure is time consuming (and my knuckles are swollen and sore-- eh, that's beside the point), but the results are really sooo worth it, so I'm not complaining. Plus cutting your own saves tons of money and you can pick from a much wider selection of colors (meaning, non-boring navys and brick reds and other colors that have no business being next to my work because they look ridiculous).