Showing posts with label operation fill-a-frame. Show all posts

Friday, March 11, 2011

New Painting! Operation Fill-A-Frame #7

My mom gave me two giant silvery frames that my husband and I decided would look good behind our couch in the teal room of our house. The two frames have been sitting in the office forever, and since they're part of Operation Fill-A-Frame (even though I don't plan on selling them), I figured since I had the idea and the intent, might as well get started on them.

We decided that some tropical birds would look cool in that room. The only birds I'd painted were these penguins and the blue heron, and for a few years now I have wanted to paint some more tropical birds... just kept putting it off. I knew right away that one would be a toucan but was unsure of the 2nd bird.
I got out a couple of canvases and began painting blue skies:


The skies were tough because if I made them too dark they would look nasty and stormy, but if I made them too light, they'd clash with the dark teal that's already on the walls. I thought these were going to be too dark for my liking but they ended up being just right.

I started the first one and sketched a bird I found after extensive research online. I ended up changing the bird quite a bit though, and added those fun little plumey things on his head.
First coat of paint, just blocking in color.
You're going to think I'm crazy, but after the first night of painting- sketching out the composition and blocking in the color, I was playing around online and went to GraphJam.com, one of my favorite silly sites. I saw this graph and didn't care so much about what the graph was actually representing- I just couldn't get enough of the color scheme.


I had to have it.
I decided to adapt my black bird to this color scheme. I made him a dark purple instead of just flat black.


I did a little more work on the plants, painted his wings, and gave him a bright orange beak rather than a plain gray one.


Finished up the details on the bird and the plants and framed him up. Done!


I'm not too happy with the composition in the mat the way that it is- even though I measured, I still went too high with his head. I might have to actually use my husband's circular saw and cut off the bottom 2 inches of the painting (I didn't paint anything there anyway) and move it down in the frame to where I want it. It's a canvas panel, so I think sawing off the bottom should be OK.

I also changed up my painting process on this one. Instead of taking a month or more to do a painting, I did this one in about 4 nights- 10 hours. I could have easily spent 40 or more hours on it though. What I'm finding at art shows is that people enjoy my art, but they seem to enjoy the subject matter more than the technique and craftsmanship that goes into it. If I spent 40 hours on a painting, I've got to charge a pretty good price for it to pay myself for my time, right? But if people like a picture but don't care or notice that every leaf has the tiniest amount of detail in it and is blended to perfection, why painstakingly take the time to do all of my paintings that way?

It's tough because you don't want to sell out, but at the same time if you have an idea that you think people might like, you've got to make it marketable- if you're going to try and sell it, that is. I'm experimenting a little with trying to find a balance there, so as I do more paintings, you may notice some of my new stuff being cheaper. I figure if I ever get myself into a prestigious art gallery, that market is going to be a lot different than the outdoor-art-show crowd (at least the ones I've gone to). The art gallery can appreciate the detailed florals, the outdoor crowd will probably enjoy the same subject matter with a fraction of the time it takes to create a more detailed piece.


Have a great weekend everyone!


Friday, February 11, 2011

"In The Waiting Line" Operation Fill-A-Frame #6

http://www.etsy.com/listing/67892531/in-the-waiting-line-2-swallowtail-study
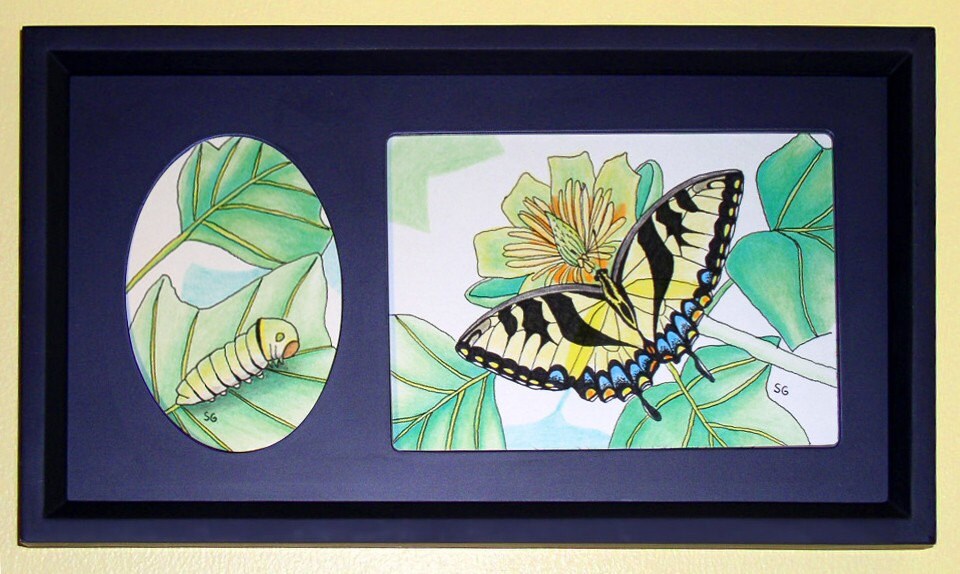
Operation Fill-A-Frame #6 is complete! This one is very similar to #5 and thus has the same title (with a 2 at the end). "In The Waiting Line 2" is another butterfly and caterpillar study, this time featuring the Tiger Swallowtail, also known as the Eastern Tiger Swallowtail.

Just like the Monarch "In The Waiting Line 1", the mat of this picture is outside of the glass, not under it. (It feels like a hard wood or plastic and is painted.) The two drawings are on a single sheet of Canson Recycled Bristol art paper, and the drawing was created with ink and my Forest Choice colored pencils.

This was another quick one, and thus, is a cheap one! $25 for this framed original drawing in my Etsy shop- you can see the listing here :)
http://www.etsy.com/listing/67892531/in-the-waiting-line-2-swallowtail-study

Man, oh man, did I learn a LOT while researching this piece.

First of all, let's talk about this caterpillar.
Years and years ago I painted a swallowtail caterpillar- does this guy look familiar?


He is, indeed, a swallowtail caterpillar. When I took the original photo of him and looked him up, that's what I learned. It made sense because the year I found him, our yard was covered in yellow tiger swallowtail butterflies.
BUT
It turns out, he's NOT the caterpillar of the tiger swallowtail. Nope. (It's very easy to get confused because if you do a Google image search for Tiger Swallowtail Caterpillar, just "swallowtail caterpillar" is included in the search and pictures of those guys come up!)

He is the caterpillar of the Black Swallowtail butterfly, seen here:

Photo by Derek Ramsey (Ram-Man)
So if those caterpillars weren't from the tiger swallowtail, then where did all those butterflies come from? And why were they staying??

Answer- because their host plant is (....drumroll....) the Tulip Tree! Well, that is one of their host plants (this should look familiar, too!) Our house was surrounded on all sides by Liriodendrons (I also learned the Tulip Tree has a bunch of different names!)  :)
http://www.samanthasartstudio.com/tuliptree2.html
And their caterpillars look way, way, way different than the guy above that I painted! What's very interesting is the variation in the caterpillars themselves. I was looking all over the web for clarification of the different caterpillars and didn't understand why so many different looking ones were all tagged as the tiger swallowtail.

Some are bright neon green. Some are brown. Some are multicolored. This is due to the different instars of the caterpillar. Each time the caterpillar sheds its skin, it looks slightly different. This happens to a lot of caterpillars, but this one seems quite dramatic to me.

Imagine my world being turned upside down upon finding out this whole time I've been telling people this caterpillar grows into the wrong butterfly!  (Sorry!)

AND
Imagine my confusion when I found out that all male tiger swallowtail butterflies are yellow and black, but only some of the females are yellow and black. The rest are just plain black! (There is also a rare morph of the two.)
See great pictures and the explanation here:
http://www.rlephoto.com/swallowtails/swallowtail_ET01.html
Eventually I'll learn the differences.... but in my confusion and endless searching for which butterfly was which, I found out there are Black Swallowtails, Black Tiger Swallowtails, Spicebush Swallowtails, and Pipevine Swallowtails
and
they
ALL
look
almost
exactly
THE SAME!

...Eeep!


Monday, February 7, 2011

"In The Waiting Line" Operation Fill-A-Frame #5

http://www.etsy.com/listing/67648352/in-the-waiting-line-monarch-study

Operation Fill-A-Frame #5 is complete! This was one of the frames I was looking forward to filling the most. "In The Waiting Line" features a big (4th instar) Monarch Caterpillar, crawling and munching his way among the Milkweeds, awaiting the time to turn into a chrysalis and become a beautiful Monarch butterfly!

The title seemed appropriate for a caterpillar and was also the name of a song I listened to while creating the art- listen here:


The mat of this picture is outside of the glass, not under it. (It feels like a hard wood or plastic and is painted.) The two drawings are on a single sheet of Canson Recycled Bristol art paper, and the drawing was created with ink and my Forest Choice colored pencils. I hadn't done a colored pencil drawing with ink in a long time- maybe not since my 30 bugs in 30 days project! I yearned to do something a little realistic, a little cartoony, and so this was created.

This was a quick one, and thus, is a cheap one! $25 for this framed original drawing in my Etsy shop- you can see the listing here :)
http://www.etsy.com/listing/67648352/in-the-waiting-line-monarch-study

I have another frame identical to this one and will probably do another caterpillar/butterfly combo drawing. I'm thinking an eastern Yellow Tiger Swallowtail butterflies for the next one!


Monday, January 24, 2011

Operation: Fill-A-Frame #4

"Love You To Death"
Oh man... what to say about this piece, where do I start?

Chronologically sounds good...
I started with the frame. I bought it at least 2 years ago. I thought the coppery-metallic-orange would look great filled with some orange tropical flower. But after getting the frame home I found myself less than enthusiastic about filling it. A tropical flower didn't seem right for it... but I had no idea what did seem right. So there it sat. I felt a twinge of guilt every time I saw it, thinking I had wasted money on yet another frame I was never going to fill, another project I was never going to complete.

In 2009 my awesome husband took me to Reptiland in Pennsylvania for my birthday. The place was amazing! (I loved it so much we returned in 2010.) There were frogs, snakes, turtles, and a butterfly house! Since it was late in the year when we went, most of the foliage and flowers were gone and only a few lonely surviving butterflies remained. I took tons of pictures of them. It was cold; they weren't moving much; you could get so close to them.

Here are two of the pictures that I took and the two that inspired the piece of art:


Fast forward to now and it's January and I'm working on this Fill-A-Frame project. I decided to take a break from the 8x10's and standard sizes I had around and get this square copper frame back out. I decided instead of a tropical flower, a monarch butterfly would look much better with the orange tones. I went through my Reptiland pictures again and loved the composition with the two butterflies (above) so much that I did a nasty (meaning, executed poorly but good and accurate enough for me to work from) rendition via Photoshop of what two monarchs would look like in the same position and began to work on the drawing.

Nasty Photoshop reference rough-draft
(I originally planned to extend the drawing onto the mat again, but I didn't have any white or light colored matboard around and eventually decided that I wanted only a small mat on this art, so unless I messed up the mat and HAD to color over it, I'd rather just have a plain mat.)

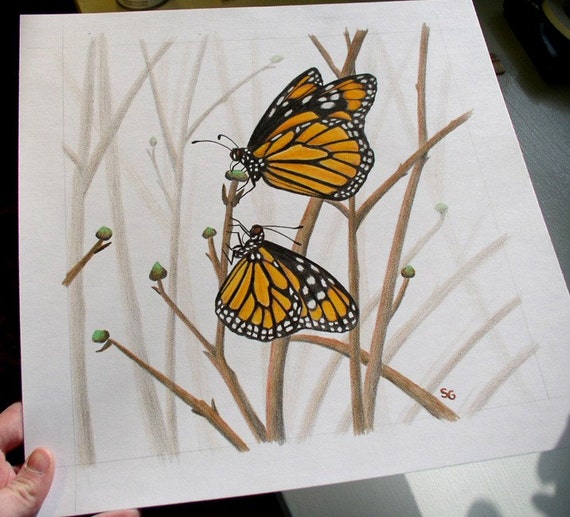
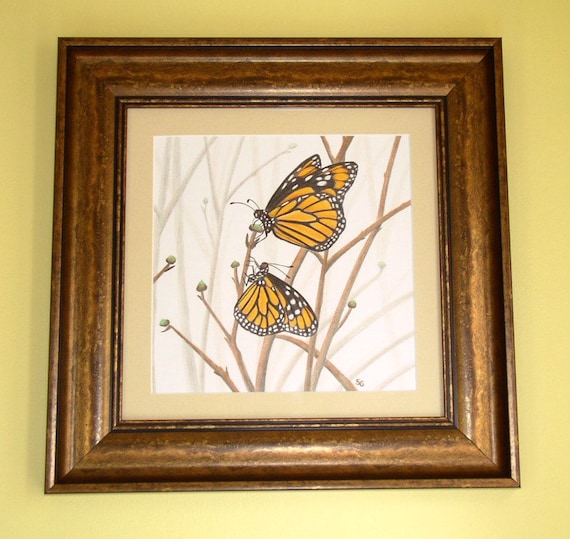
Here's the finished drawing:

I usually have trouble naming a drawing or painting, but most of the Fill-A-Frame project names are coming from songs or albums I'm listening to at the time that I create the art. It seemed quite fitting for this piece that the song I currently can't stop listening to is called "Love You To Death."


Why fitting?
I know, usually my art is super cheerful and happy, right? I definitely stepped out of my comfort zone a little for this one.

Here's why. The pictures that inspired the art were taken in a butterfly house... right before winter. Normally Monarch butterflies would migrate, but when importing live butterflies (chrysalis) from other states into a butterfly house, it's actually illegal to release those butterflies into the wild. When you visit a butterfly house, do you ever notice all of the signs asking you to check for "hitchhikers" before you leave? It's not just because they don't want to lose their butterflies... they don't want to break the law! When non-native species are released into a new environment, they can breed like crazy and mess up entire eco-systems... so there are strict laws against releasing those imported butterflies.

So even though the Monarch species was native to the area of the butterfly house, they still weren't allowed to be released into the wild. They, and the other remaining butterflies, had to just sit in the butterfly house and wait to die in the cold. I found it particularly sad with the Monarchs since they would've normally migrated south. They were imprisoned and just waiting for death.

Since there were a pair of them in this picture (well, in my made-up picture), it seemed at least a little more comforting that the two butterflies had each other and could wait for death together. Hence the "Love You To Death" title. (I know that's not what the actual song is about, but the title fit well.)

Next it was time to mat the drawing. Since I didn't need a huge mat, I went to a local art gallery to see if they had any matboard scraps around that they might otherwise be throwing away. Sometimes galleries will sell them to you cheap or in rare and especially nice cases just give them away! :) I got EXTREMELY lucky because not only did I find one of those NICE galleries, the lady working in the matting section even cut it to size (I did the inside cut) and the mat was this really cool tan color with some grayish-fibery-pieces in it. It was perfect; no way was I going to draw on it.

I put it all together, and there you have it. My first piece of sad artwork.


Sunday, January 23, 2011

Operation Fill-A-Frame #2 & #3

I filled up a couple more frames a while back and completely forgot to post about it!

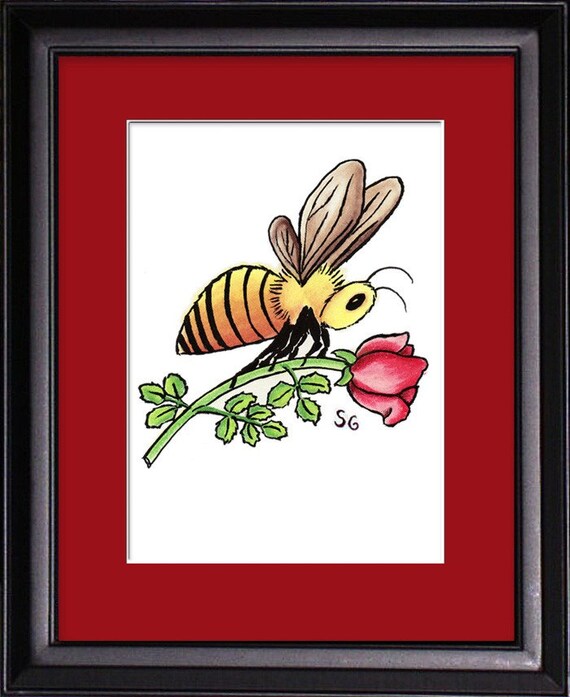
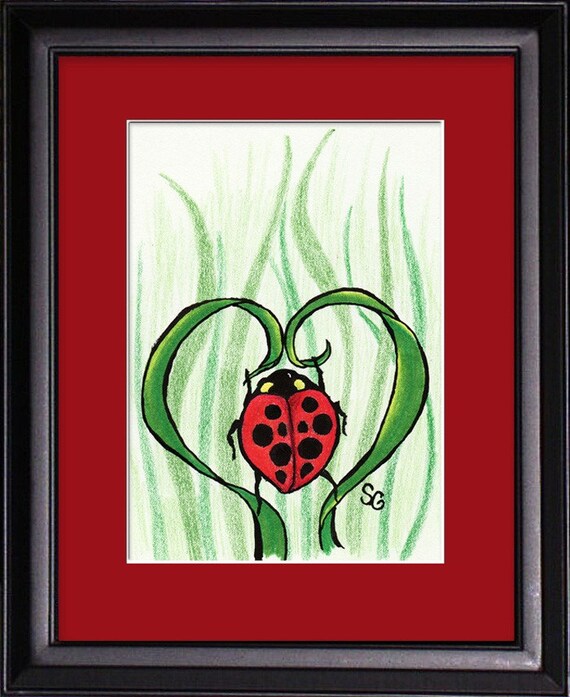
Valentine's Bugs!
This artwork wasn't created specifically for Operation: Fill-A-Frame, it was actually created last year for an Etsy Team Challenge. However, like the frames, it was something I had laying around that I wanted to finish (i.e. frame it) eventually. So the two projects came together perfectly! I had the art... I had the frames... They just needed mats.


I was really torn between matting it in green or red. The dark green went well with both pieces and seemed practical because dark green is easy color to match to almost any decor in any home. But since the art was created for Valentine's day, it made sense to frame it in the obligatory red. People love buying things in red for Valentine's day... for what other reason does every store currently look like red, pink, and magenta came in and threw up all over their entryway!?

I decided to offer the option of either color mat.

They are both pastels with ink. Both pieces are currently $35 each, but check the listings as they may go on sale. I may offer a bundle discount if someone's interested in buying both!

Original "Bee Mine" framed artwork
If you're interested in buying this piece or seeing more photos, it's here in my Etsy gift shop:


Original "Love Bug" framed artwork
If you'd like to buy this piece or see more detailed photos, it's here in my Etsy gift shop:

This ladybird beetle one was a tough one- I had an idea for the composition but it took a lot of sketches to get it just right. Ladybugs love climbing around on the grass and the red and green colors look so nice together. The little beetle is pulling down blades of grass into the shape of a heart, and I made his little body slightly heart-shaped too :)


Tuesday, January 4, 2011

Operation: Fill-A-Frame #1

Now available in my Etsy shop:
http://www.etsy.com/listing/65263488/oleander-moth-charisma-original-artwork

Number one is complete! A couple of nights ago I dreamed about moths- fuzzy, soft, friendly moths flying around and landing on people and instead of going "EW EW EW!" and swatting and flailing at the moths, everyone welcomed them, which made me happy. I always enjoy a friendly moth visit :)
Anyway, the dream was what inspired this piece. I've wanted to draw or paint an Oleander Hawk Moth with Oleander forever, so I finally did it.

I did 3 new and different things with this piece:

#1 I left the background white. I usually can't do that with colored pencils because the little flecks that accumulate as you press down HARD (like I do) stick to the paper and make tiny obnoxious specks. You can blow at them and hope they fly away, or sometimes take a pin or tip of an exacto and try to remove them like a surgical procedure. More often I end trying to so-gently brush them away with my hand... which results in a colored smear, hence why my backgrounds are always filled with color. At least with a painting I could just paint the whole background white when I'm done and cover up the mistakes! ...Now don't get me wrong, I had my share of little flecks that did find their way onto parts of the paper where I didn't want them! When that happened I added a flower bud or a leaf to cover it up :)

#2 I used a new set of eco-friendly colored pencils. I wrote a little about this yesterday in my review of the colored pencils (it was my first time using them and I loved them). I picked out the frame I was going to fill, then grabbed my box of colored pencils and picked out the paper I was going to use- a Strathmore drawing paper made from recycled paper. I realized at that point that if I used my eco-friendly colored pencils instead of my regular ones, this whole finished piece would be made from environmentally friendly materials and I thought that would be really cool. So I put back the box of colored pencils and, instead, took out the little package of 12 eco-friendly pencils.

This presented a challenge as well because I went from having a whole box of many colors from which to choose, to having only these 12. And of those 12, I used only 9:


#3 I let the drawing overflow onto the mat. I've always wanted to do a drawing and mat it and have parts of the drawing spill onto the mat for that sort-of 3D effect. I've seen it done so many times by other artists but never actually completed a drawing where I felt like putting some of it onto the mat would necessarily add anything to it. I decided that it would be fun to do with this piece.

Here are some pictures of the piece as it progressed:

Moth is done, starting on the flowers.

The drawing on paper is done. Time to mat it up!

The drawing extended onto the mat.

Framed & ready for its close-up :)


Sunday, January 2, 2011

Operation: Fill-A-Frame

After we moved and I unpacked all my art stuff, I decided to actually try and organize some things this time around! One of the first things I did was organize ALL of my empty frames, or frames that did have something in them but the frame got scratched or something.

Sooo many frames.

More frames!
Hm. I have a lot of frames.

A bunch of them were given to me by friends or family- one of my best friends goes to Salvation Army once in a while and if she sees a nice frame for a cheap price, she'll pick it up for me. Some of them I picked up if I saw a good sale going on, not realizing how many frames I already had!!

My goal in organizing the frames was, eventually, to fill them/fix them/paint them/all of the above. Whatever they need to get into good shape and be worthwhile. I also decided that while I could easily fill them with various prints, instead I'd fill them with ORIGINAL art. If the piece needs a colorful and unique mat, I'll use of some of the matboard I have sitting around and do a custom job for that piece. As I finish pieces, I plan to put them in my Etsy Shop since that's the easiest way for me to create unique listings for original one-of-a-kind pieces. If I do any art shows this year I'll probably bring the pieces there as well.
(I haven't signed up to do any art shows this year because #1 I was too busy with the move and #2 I'd like to do some of the local shows here but want to see where I'd fit in best before dropping $500 per show and picking shows at random.)

I'm hoping to start filling a frame today. I woke up feeling quite inspired since last night I dreamed about moths. Soft, friendly, fluffy, fluttery moths that were flying around and landing on people. Beautifully colored moths- luna moths, oleander moths, etc.I'm looking forward to finally getting out my colored pencils and using them again!!